Getting Started
By following this quick start guide, you'll build an interactive demo scene showcasing different types of hand interactions on VITURE devices.
Unity's XR Interaction Toolkit (XRI) already provides a comprehensive hands interaction demo with three major interactors: near-field direct interactor and poke interactor for close-range objects, plus far-field ray interactor for distant targets. The original sample scene uses XRI's default input actions, we'll replace those with VITURE-specific inputs to make all interactors work seamlessly with VITURE hand tracking.
Prerequisites
Before getting started, ensure you have downloaded the VITURE Unity XR SDK (com.viture.xr) and have the following tools installed:
Project Setup
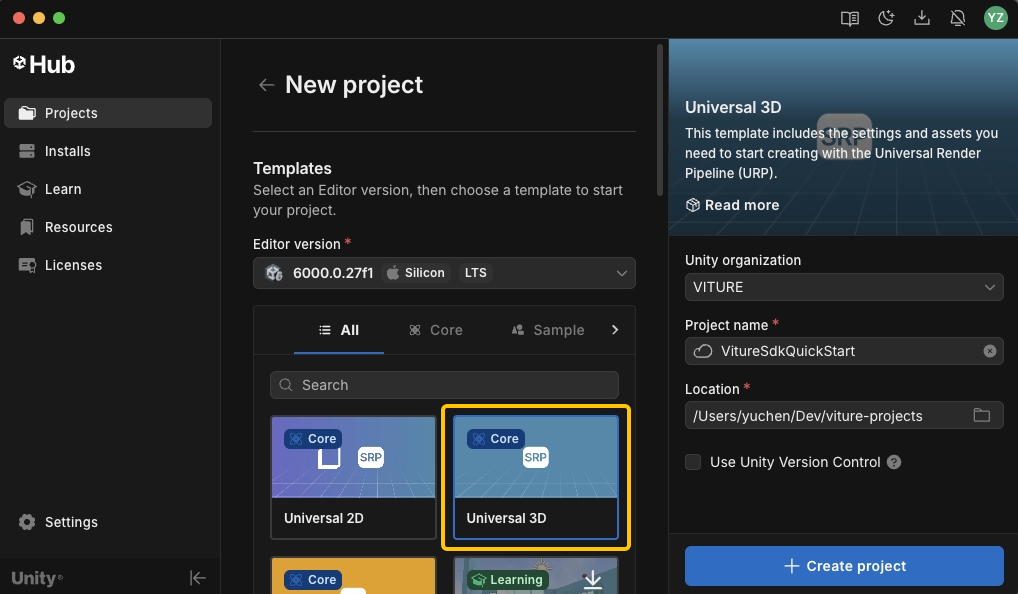
Create a new Unity project using the Universal 3D template. While URP isn't mandatory, we highly recommend it for all VITURE XR projects.
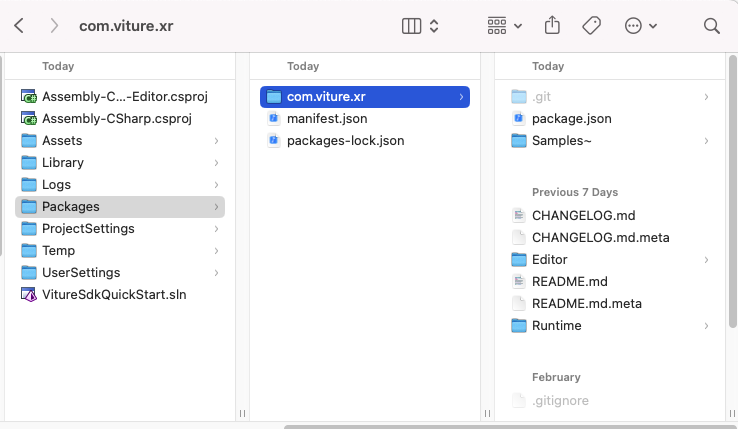
Extract the VITURE Unity XR SDK (com.viture.xr-x.x.x.zip) and copy the com.viture.xr folder into your project's Packages directory.
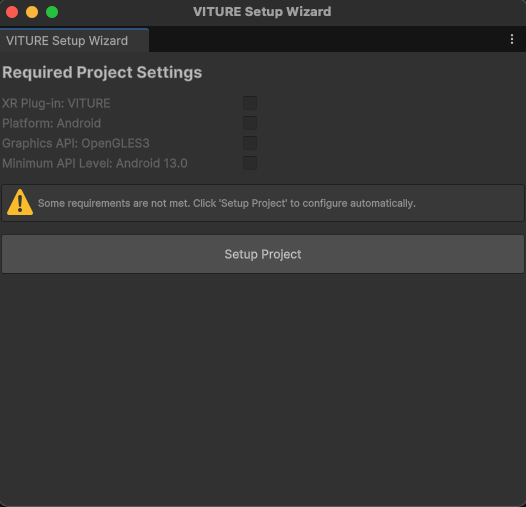
Once the SDK is imported, the VITURE Setup Wizard window should automatically pop up, which helps you configure all required project settings. If the wizard window doesn't appear automatically, you can open it manually by going to VITURE > Setup Wizard in the menu bar. Click Setup Project and your project is ready for VITURE XR development!
Next, we'll import the sample assets and build an interactive demo scene!
Import Required Samples
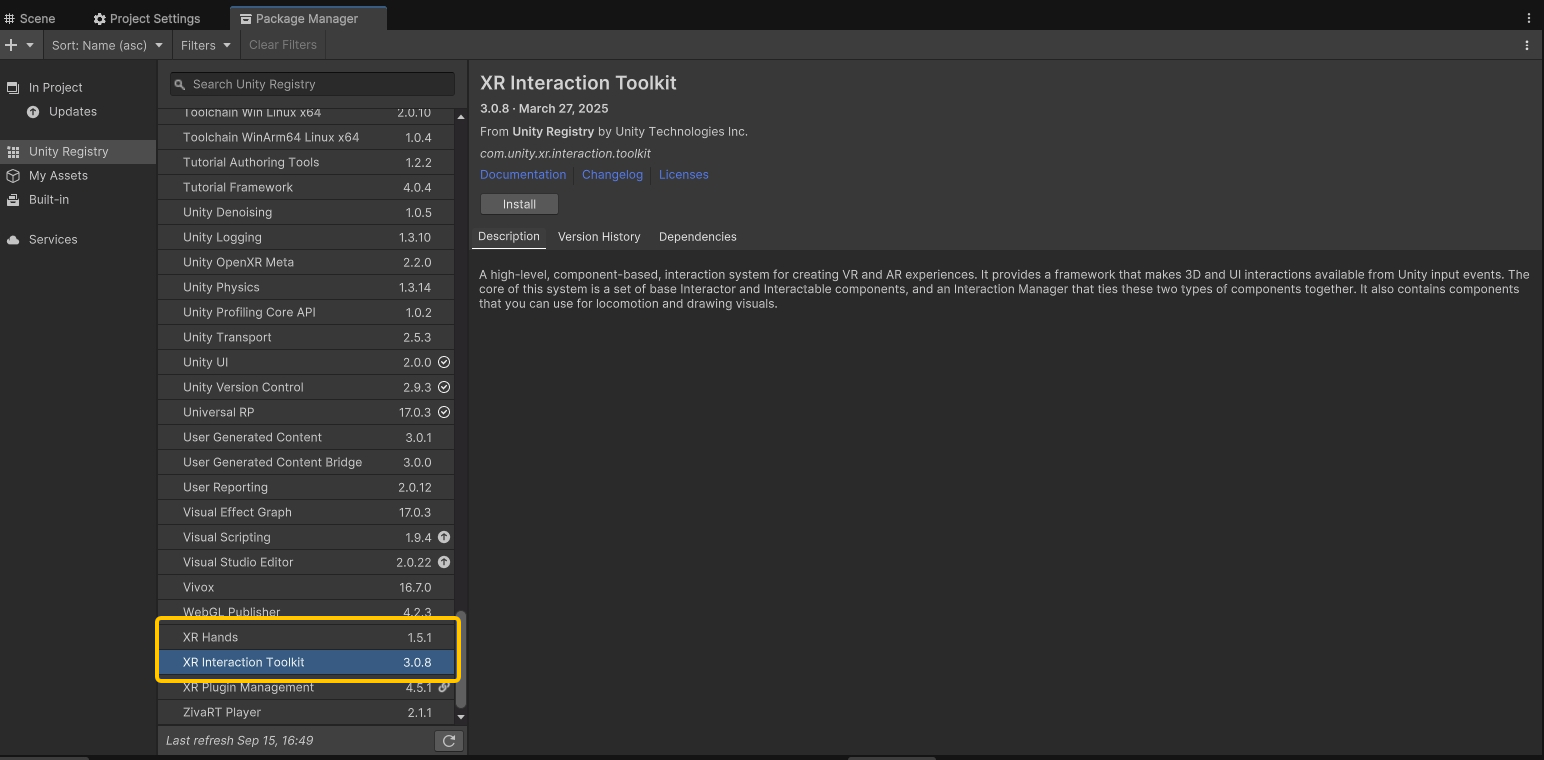
Navigate to Window > Package Manager > Unity Registry and install XR Interaction Toolkit and XR Hands.
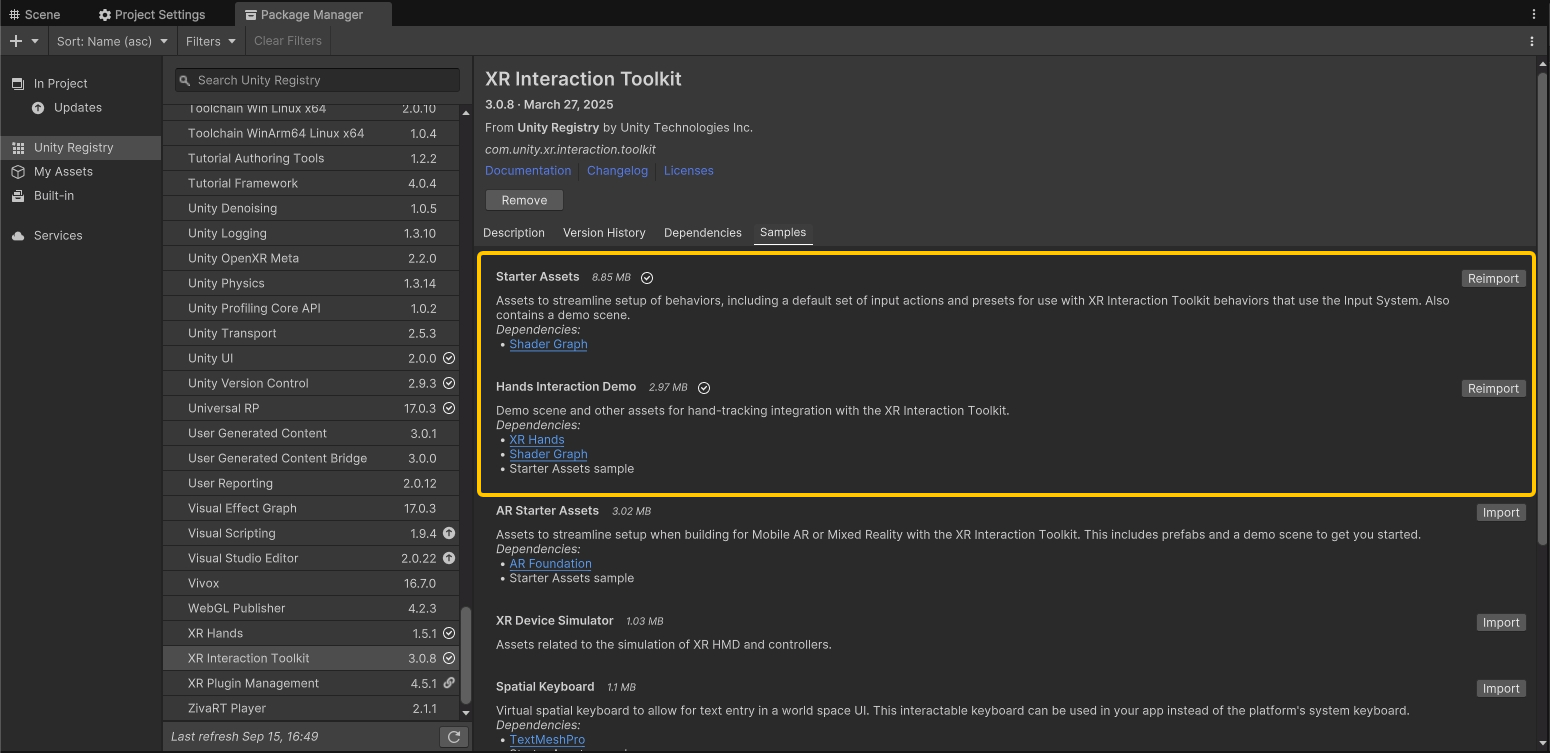
From the XR Interaction Toolkit package, import the Starter Assets and Hands Interaction Demo samples.
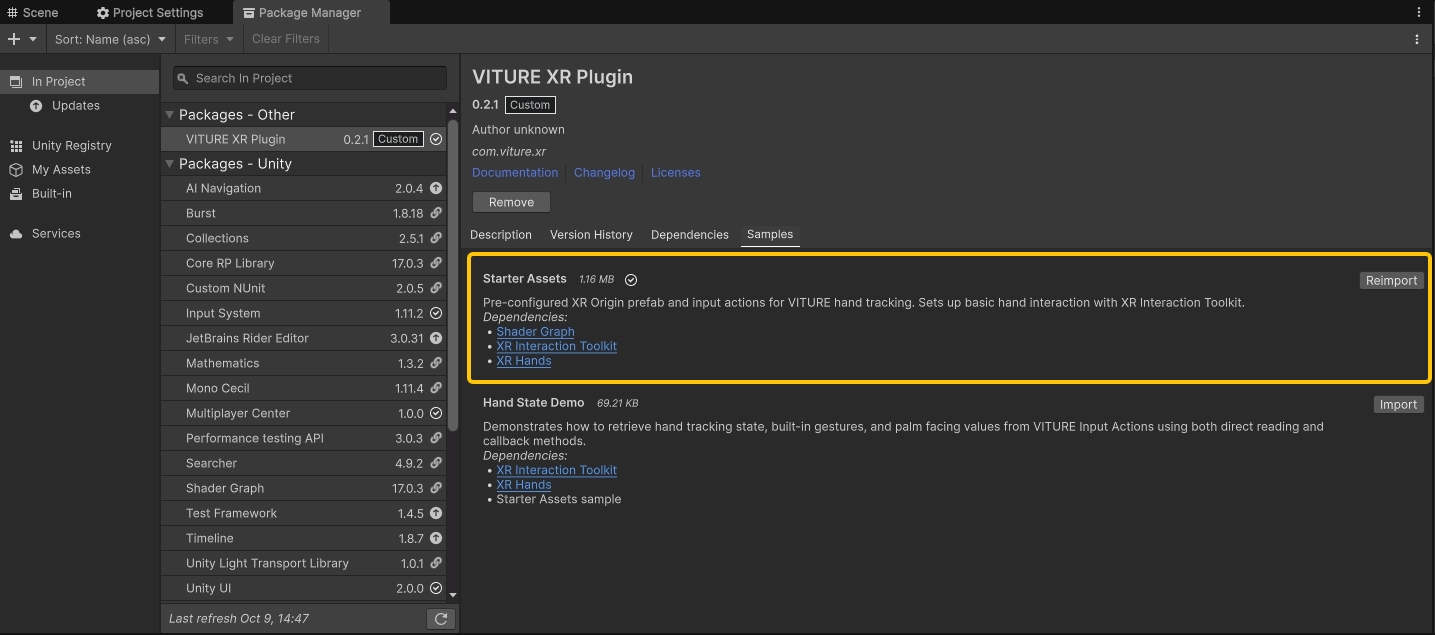
Finally, go to Window > Package Manager > In Project > VITURE XR Plugin and import the Starter Assets sample.
Configure Demo Scene for VITURE Input
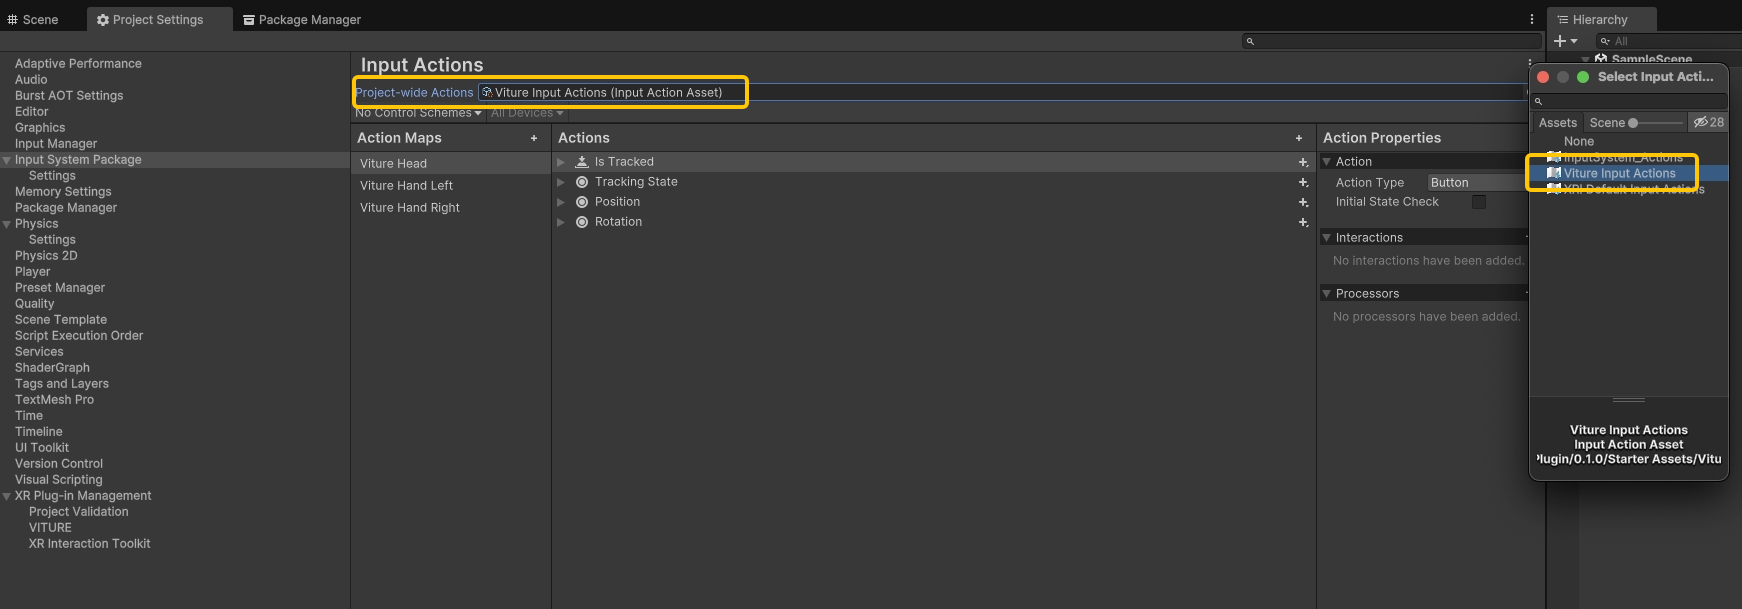
Go to Edit > Project Settings > Input System Package and set Project-wide Actions to Viture Input Actions.
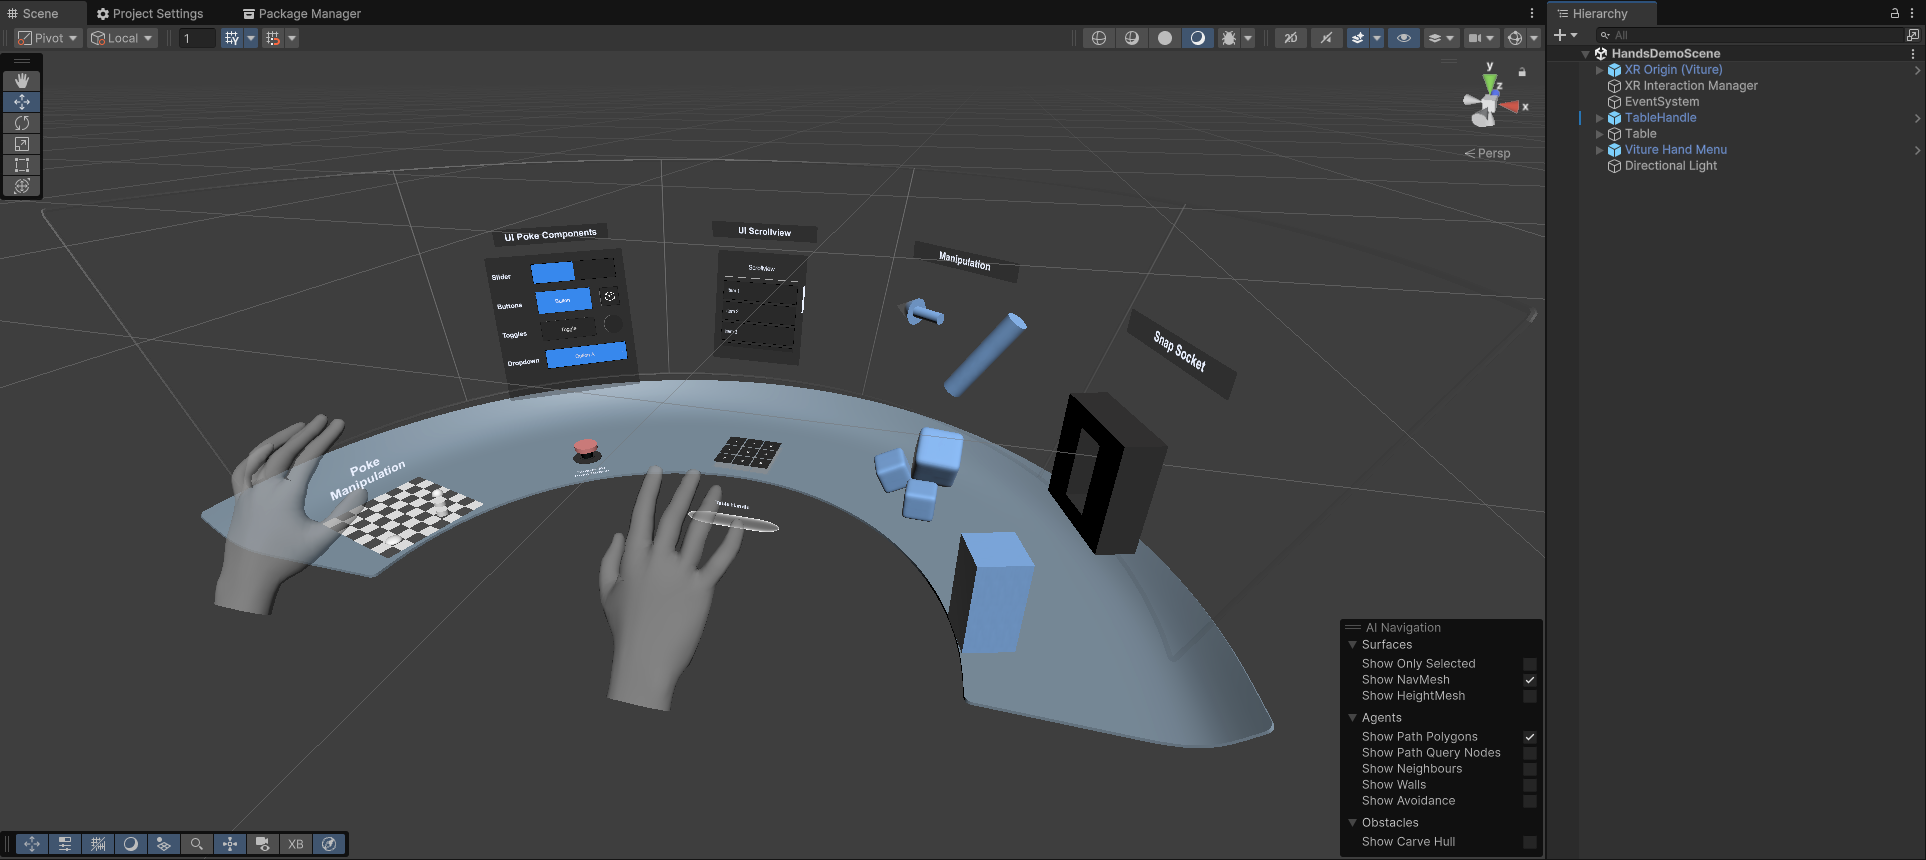
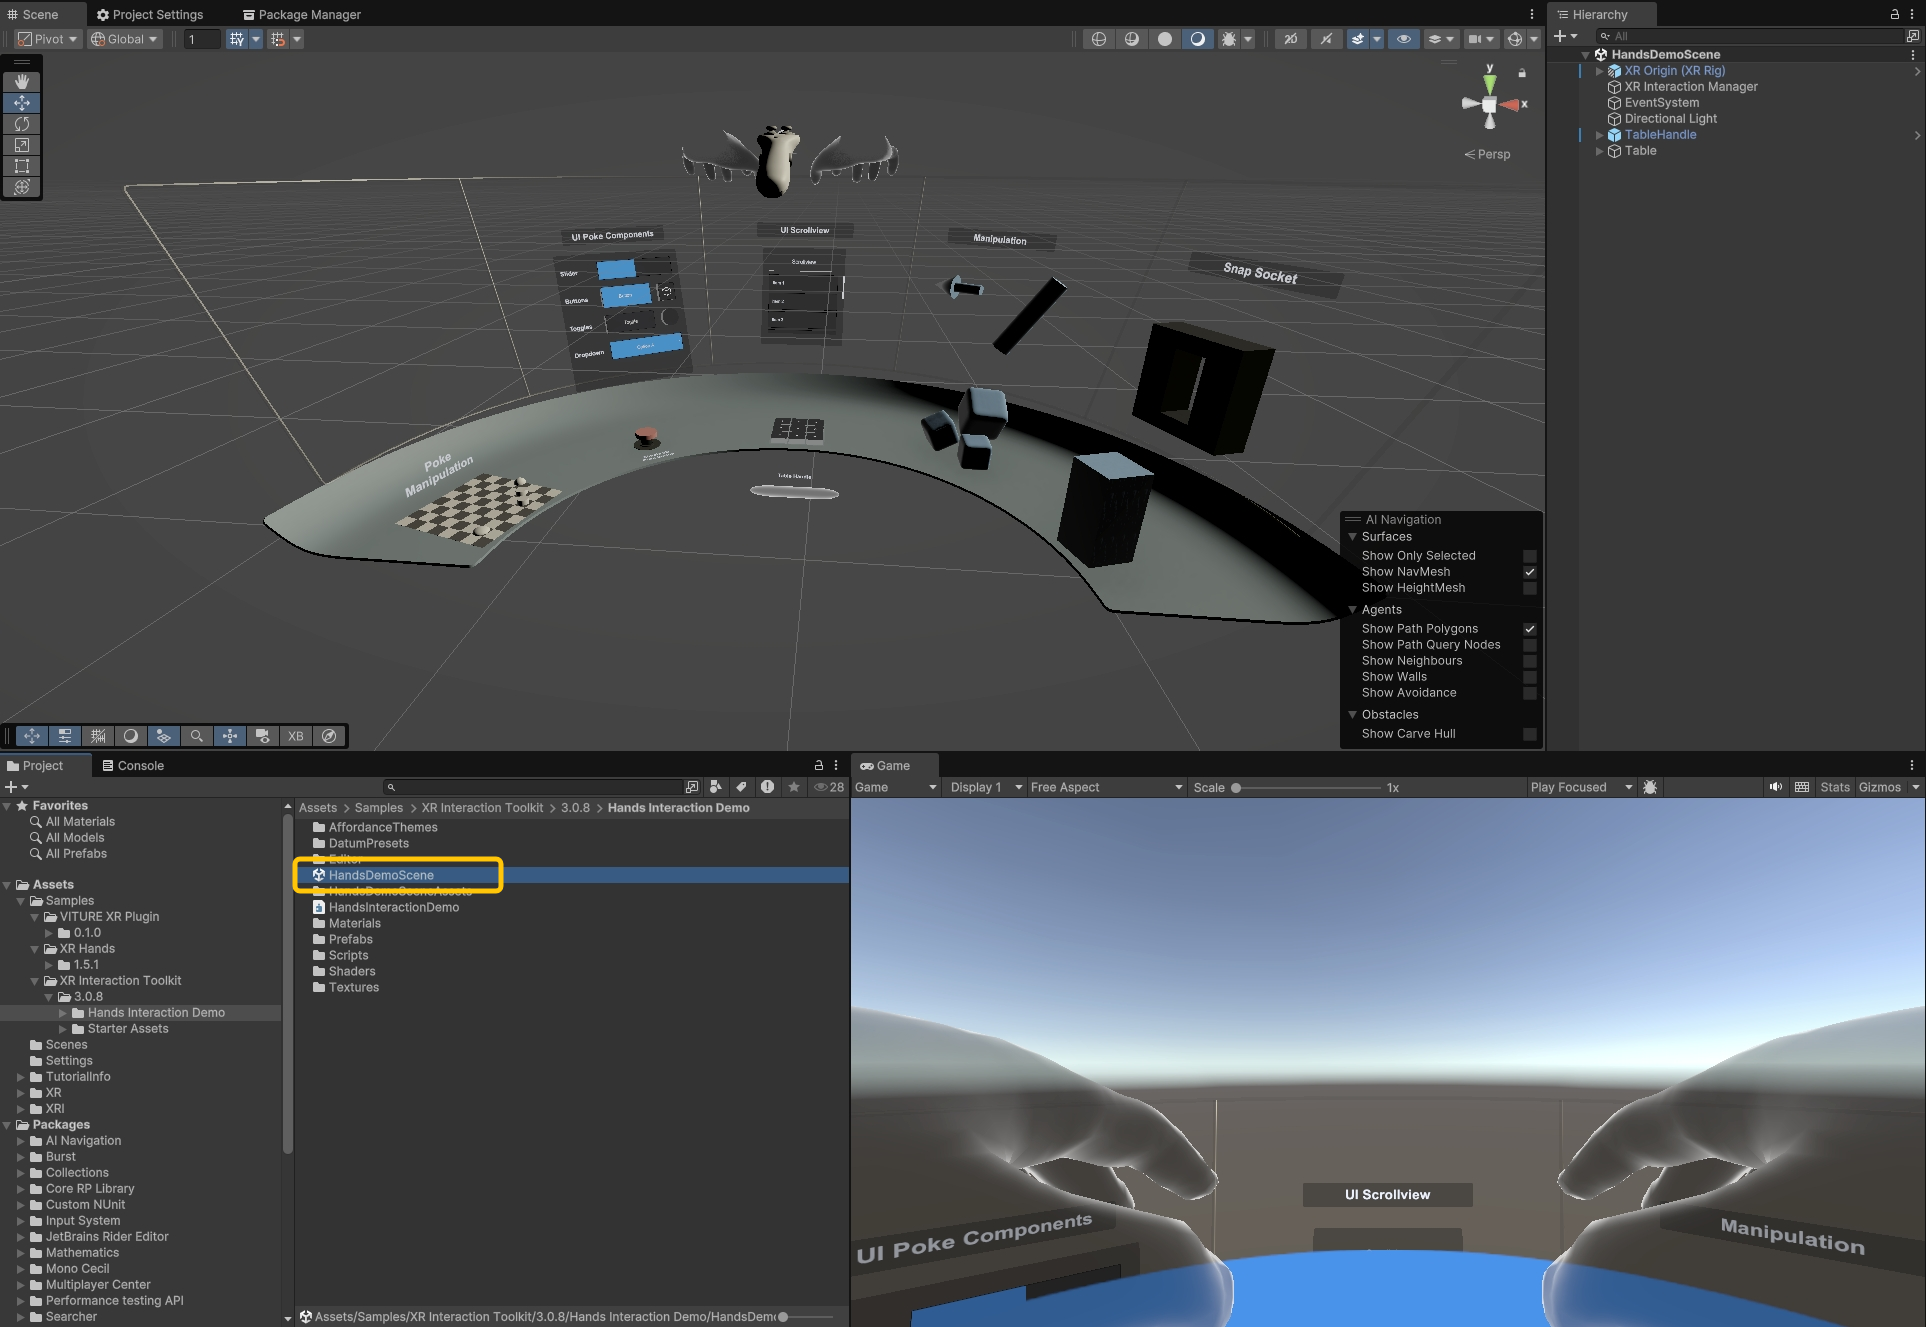
Navigate to Assets > Samples > XR Interaction Toolkit > x.x.x > Hands Interaction Demo and open the demo scene. This scene uses default XRI input actions that we need to replace with VITURE-specific ones.
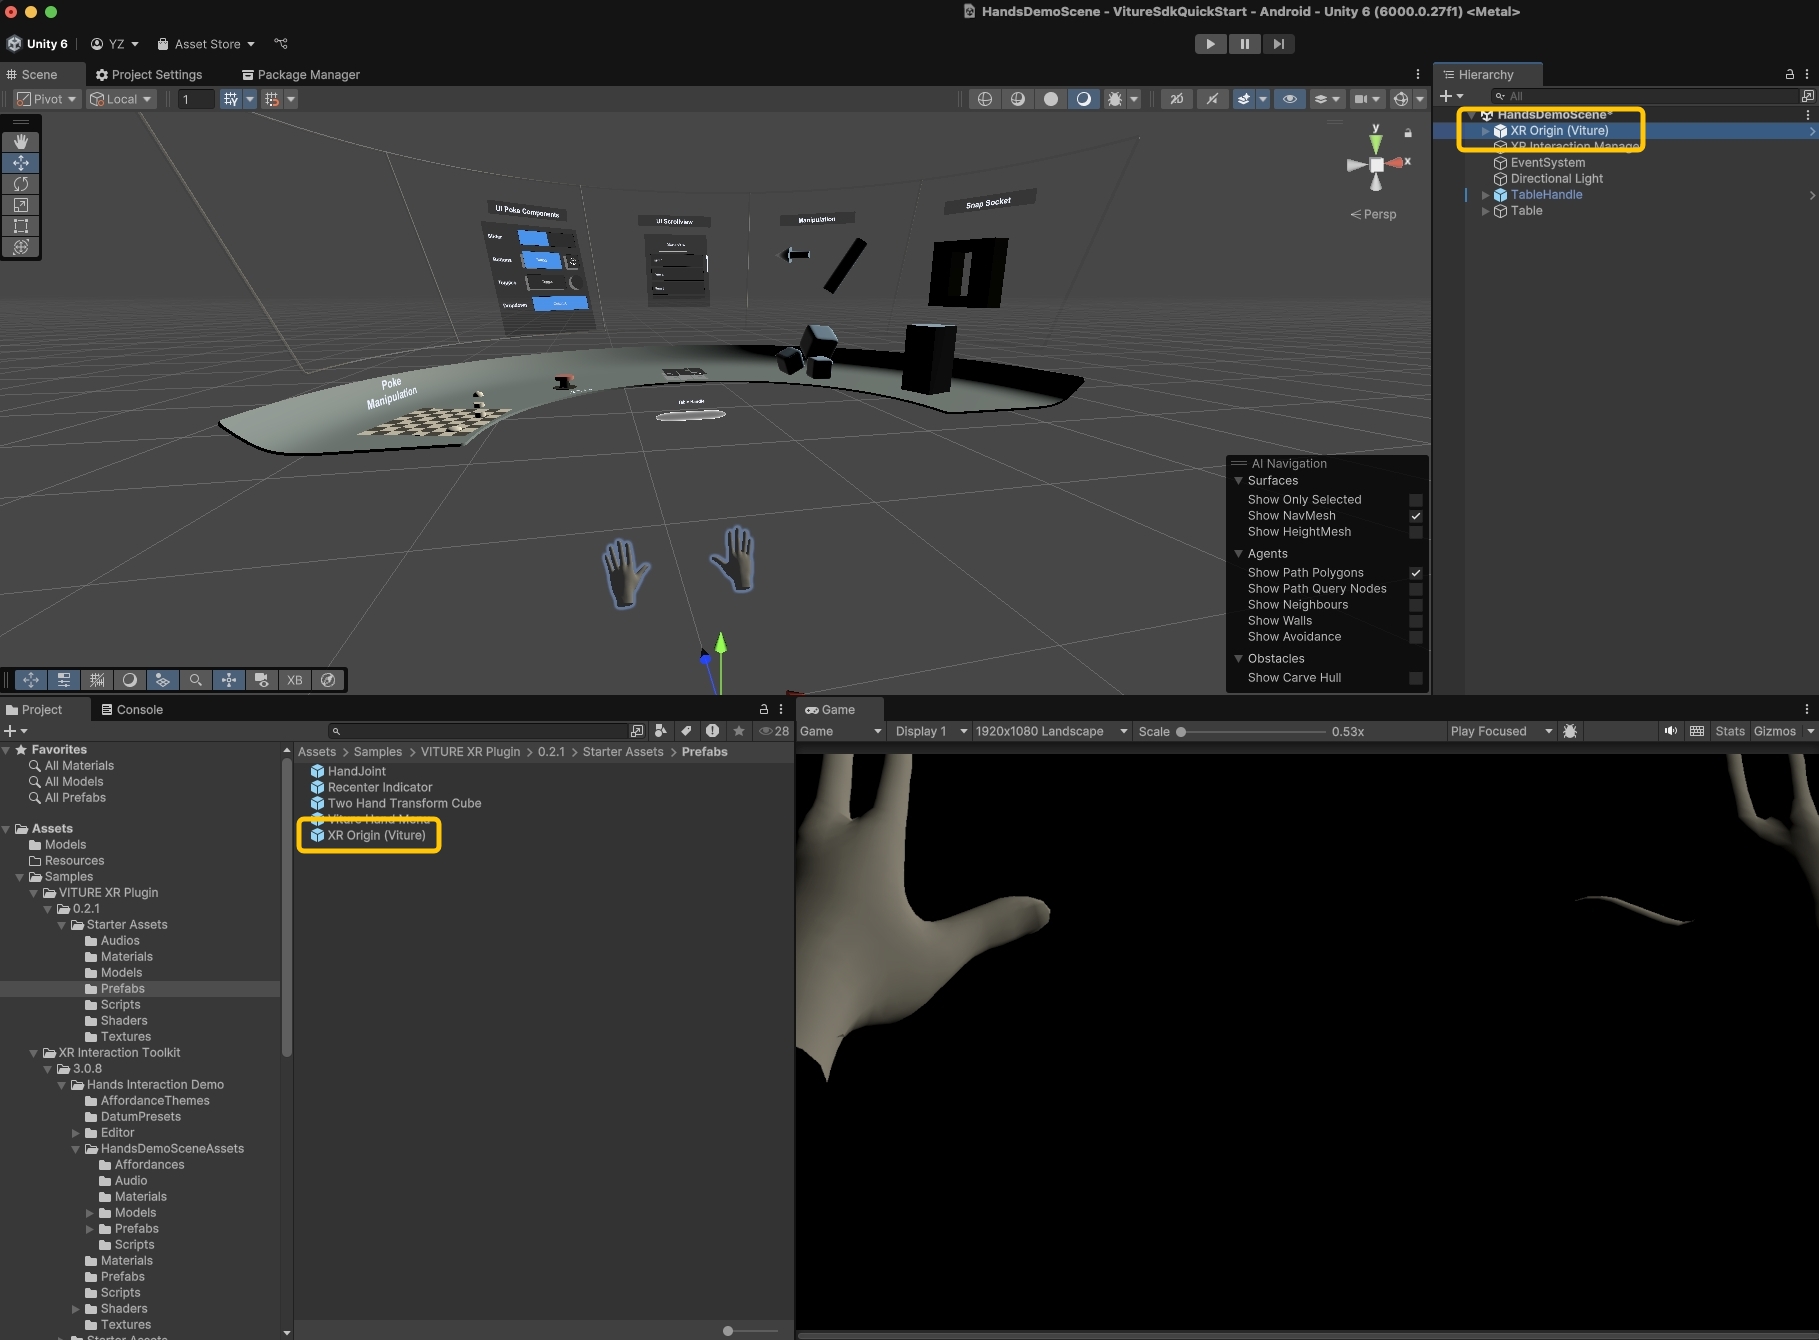
Delete the existing XR Origin (XR Rig) from the scene hierarchy. Replace it by dragging XR Origin (Viture) from Assets > Samples > VITURE XR Plugin > x.x.x > Starter Assets > Prefabs into the scene.
Drag the Viture Quick Actions prefab from Assets > Samples > VITURE XR Plugin > x.x.x > Starter Assets > Prefabs into your scene.
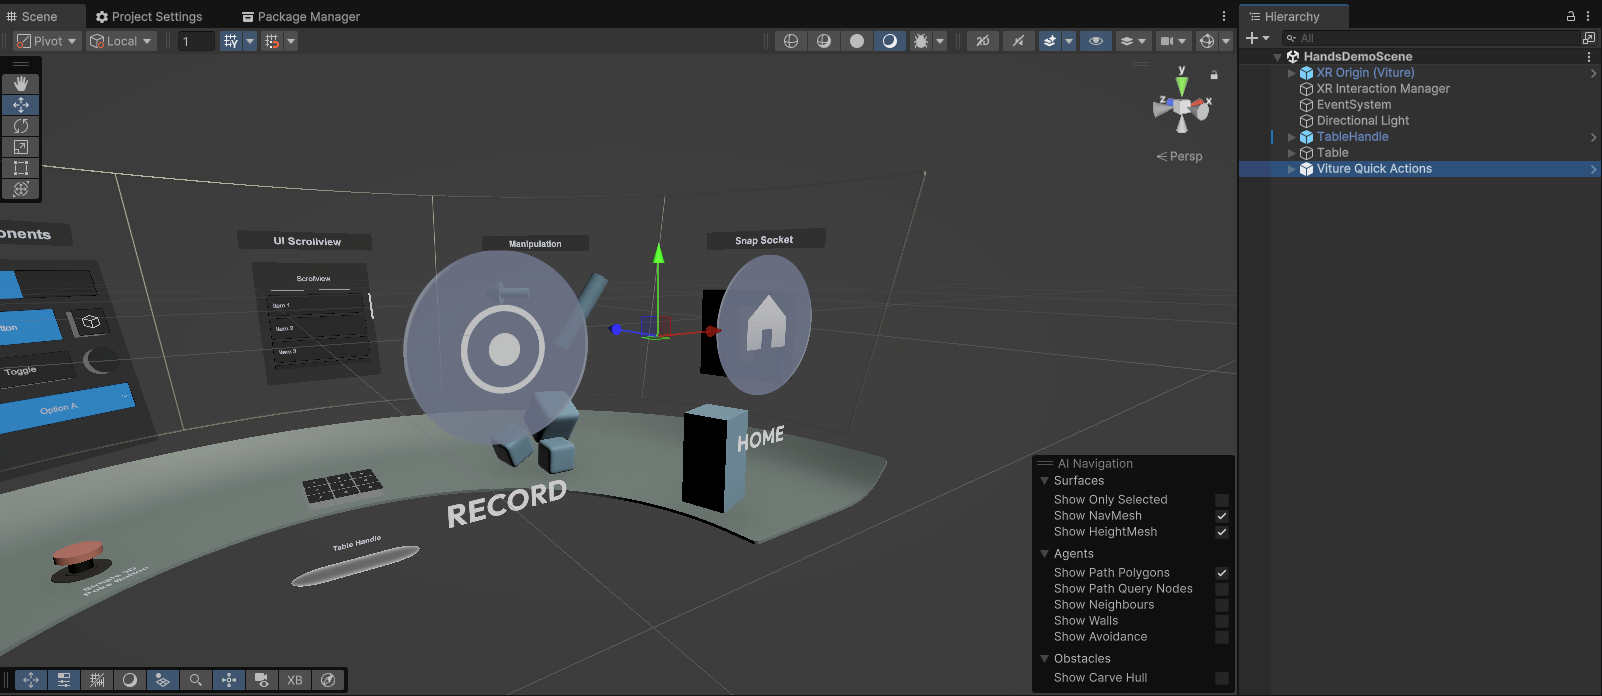
Viture Quick Actions is a system UI that appears when users look up, providing essential functions: Record (first-person mixed reality recording) and Home (exit to launcher). We recommend including this prefab in all VITURE XR applications.
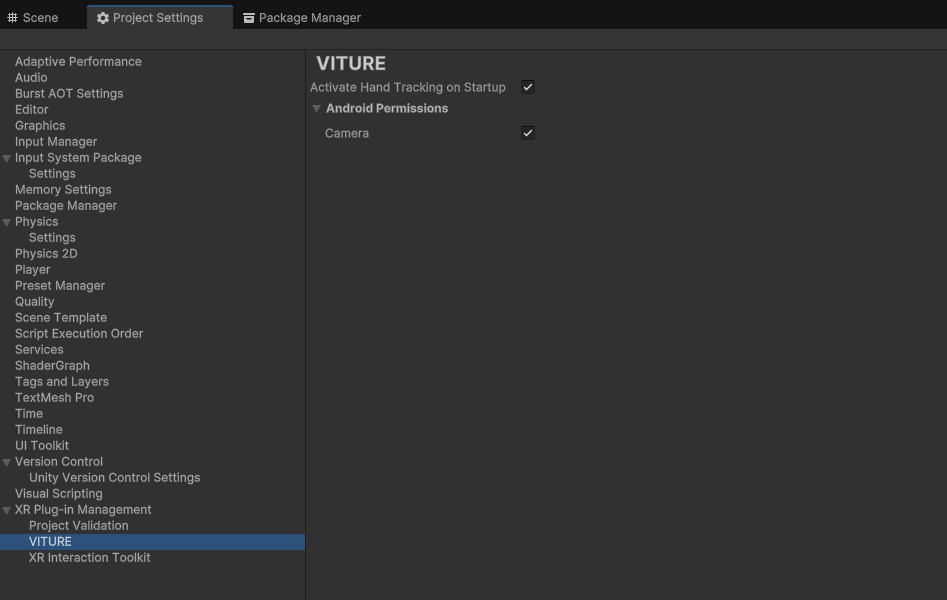
The first-person recording feature requires RGB camera access. To enable this, go to Edit > Project Settings > XR Plug-in Management > VITURE and check the Android camera permission.
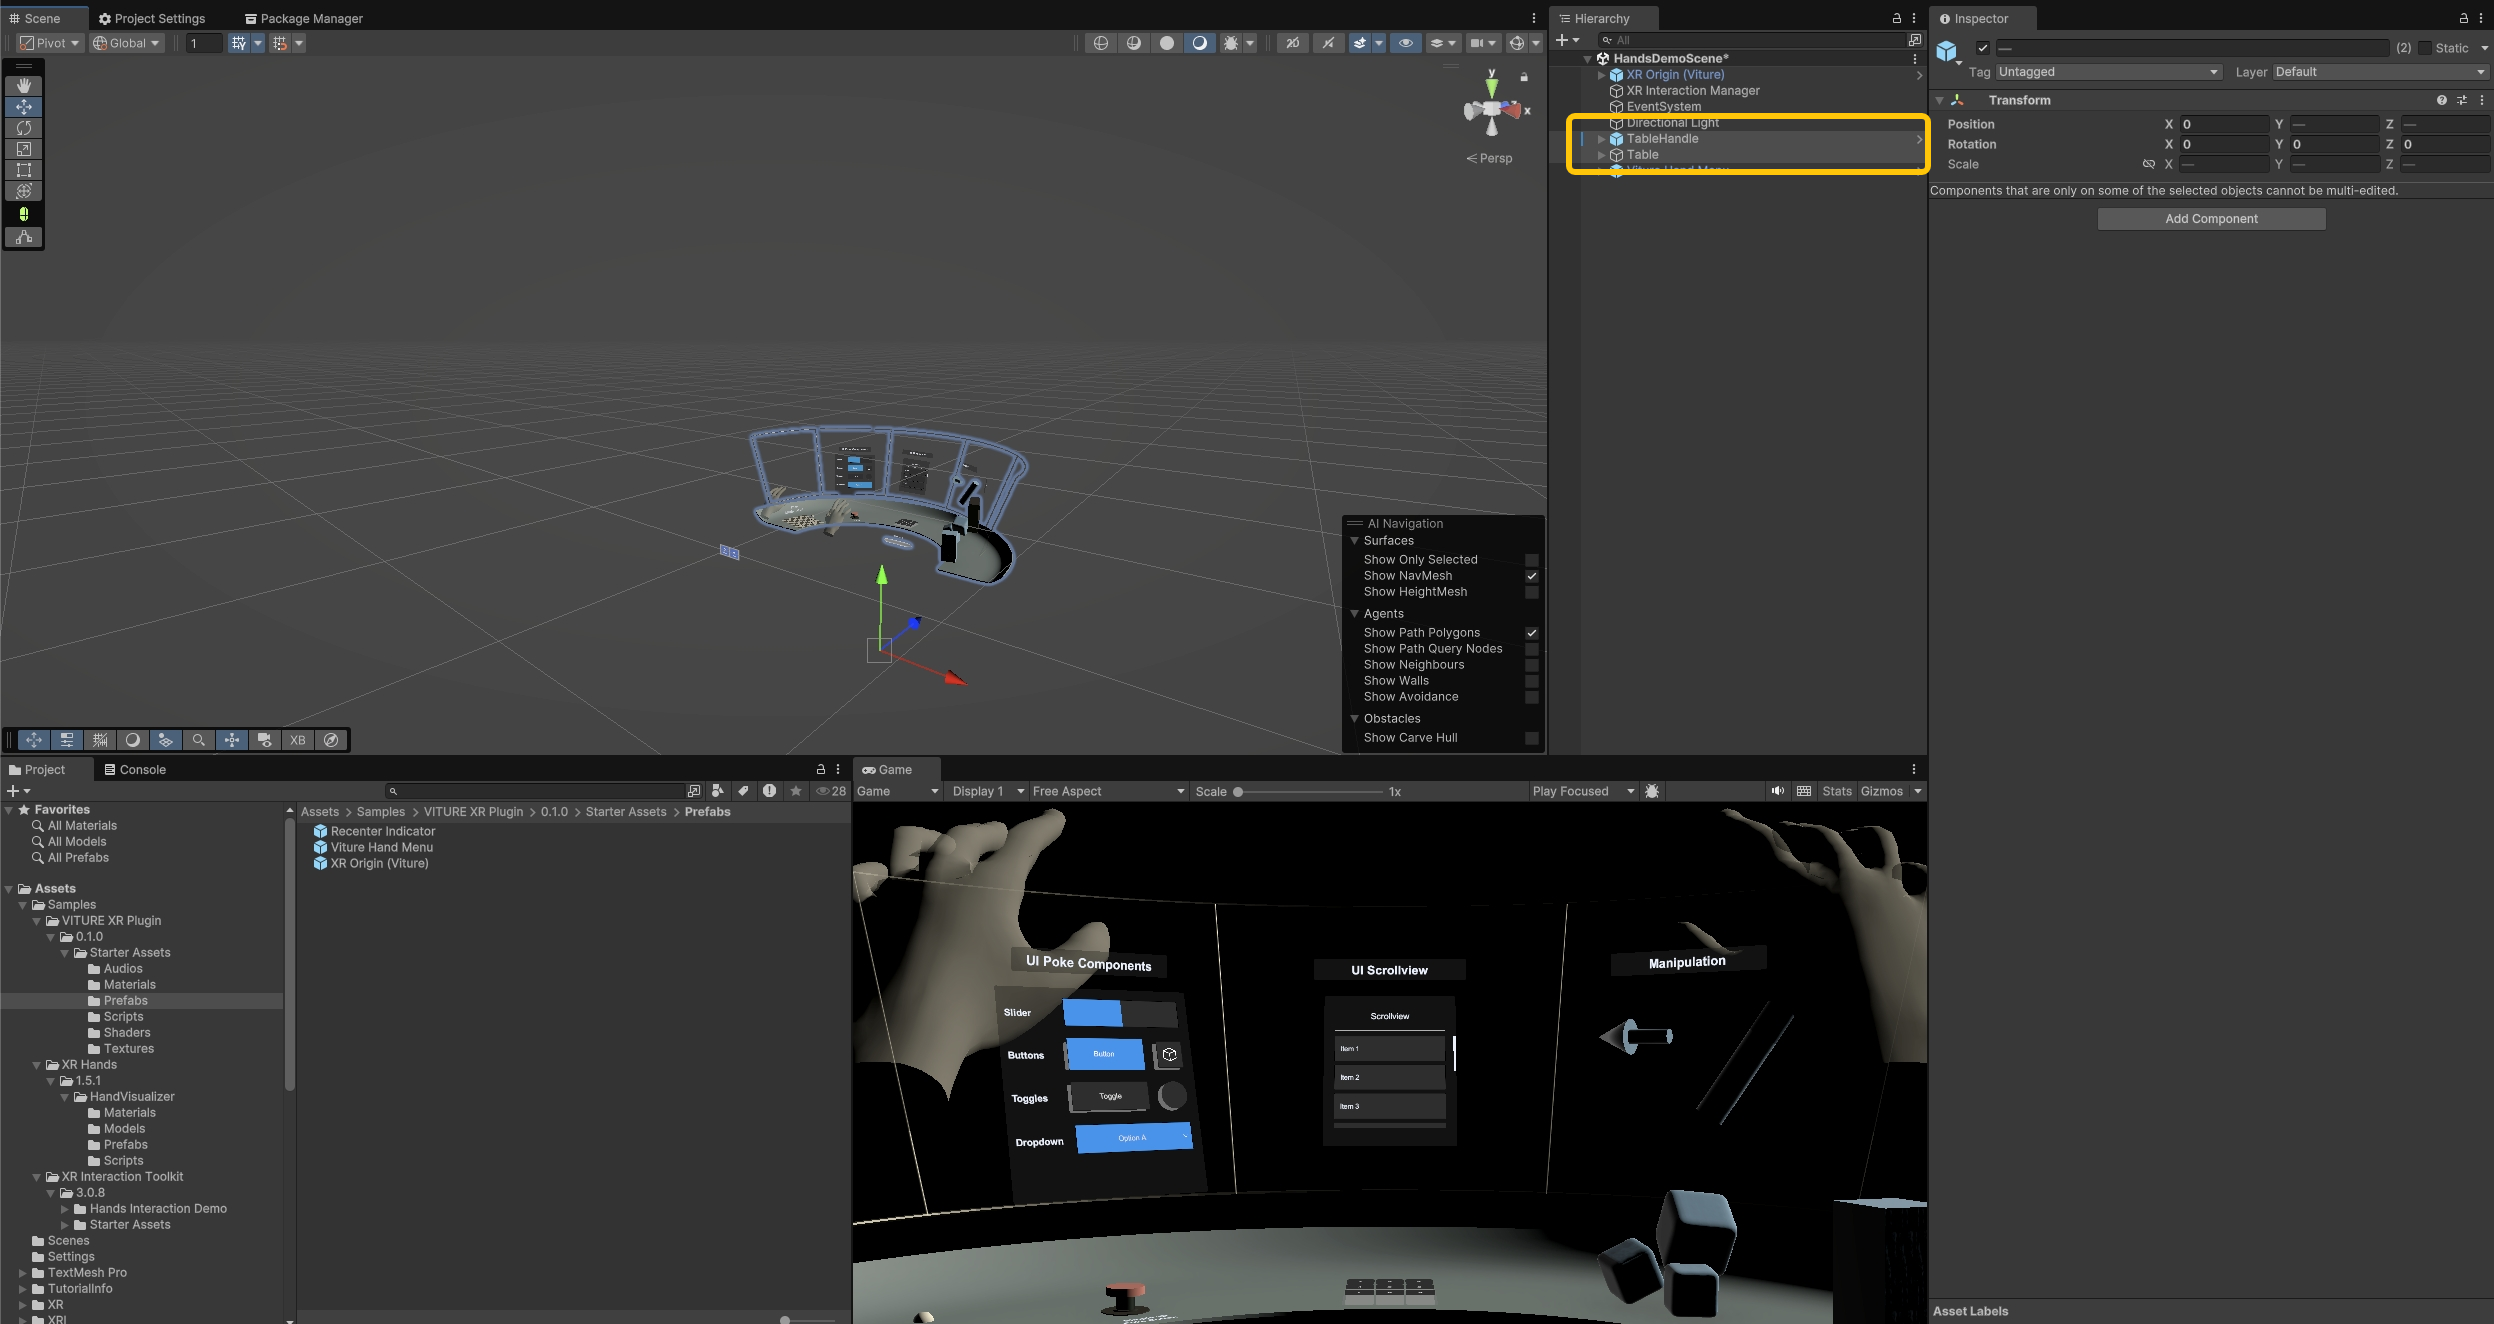
The default table position is too high for comfortable interaction. Select both TableHandle and Table in the Scene Hierarchy and move them lower and forward for better accessibility.
The default Directional Light may appear dim in the demo scene. Adjust its rotation to make the scene brighter.
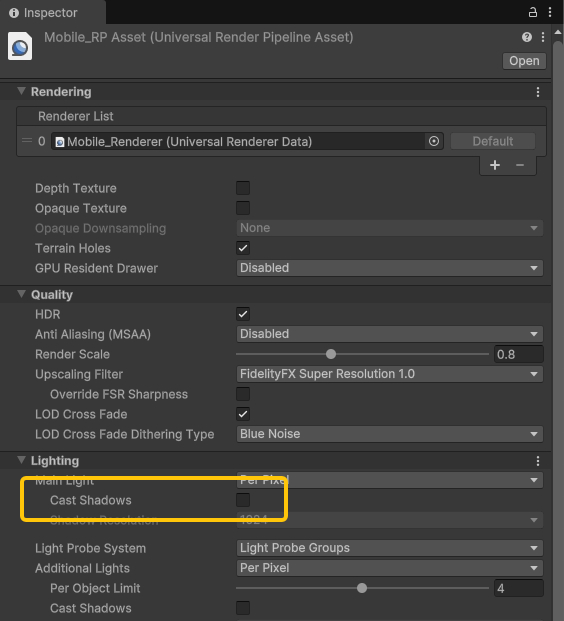
For optimal performance, we recommend disabling shadows in your URP settings. Navigate to Assets > Settings > Mobile_RPAsset and disable the Cast Shadows option.
Build APK
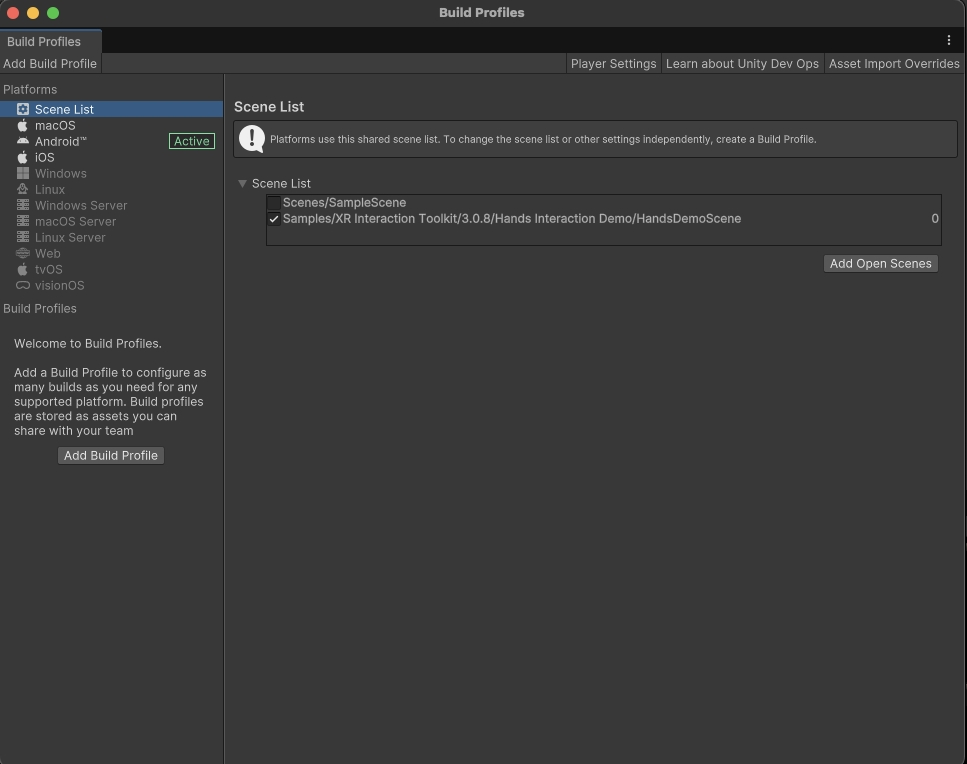
Go to File > Build Profiles > Scene List and click Add Open Scenes to include only the HandsDemoScene in your build.
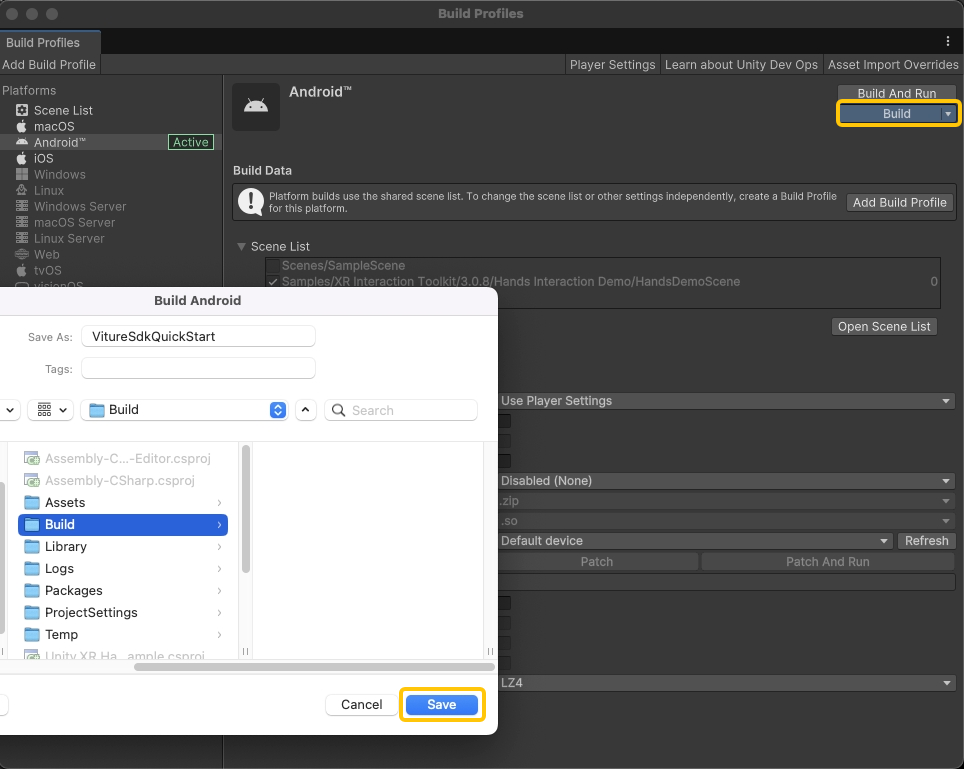
Click Build, create a Build folder, name your APK, and click Save to start the build process.
Congratulations! 🎉 You've built your first VITURE XR application.
Deploy to Device
First, ensure ADB (Android Debug Bridge) is installed on your computer.
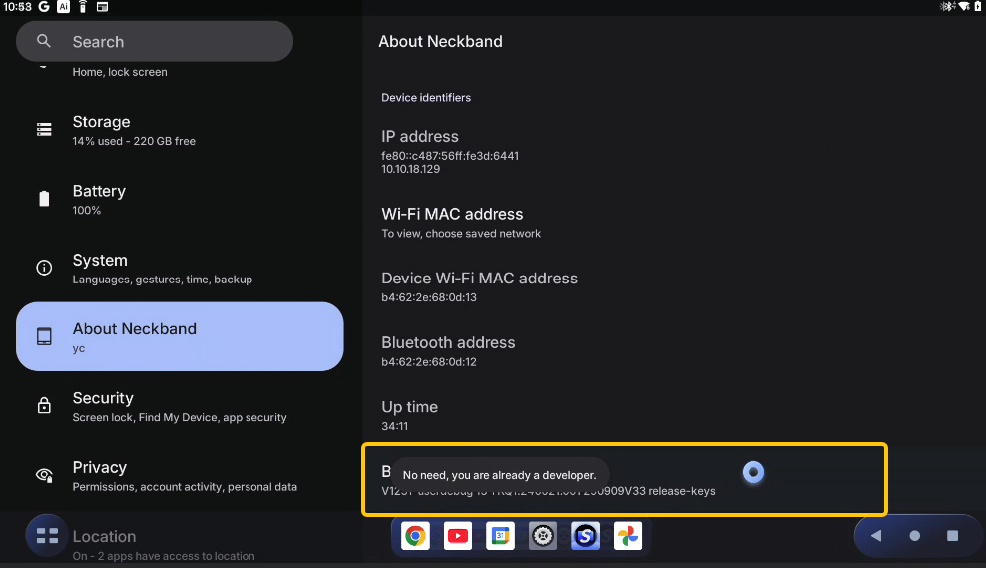
Enable Developer Mode by opening Settings and navigating to About Neckband > Build number. Tap the Build number area 7 times to unlock Developer Mode.
Navigate to System > Developer options and enable Wireless debugging. Click Allow when prompted.
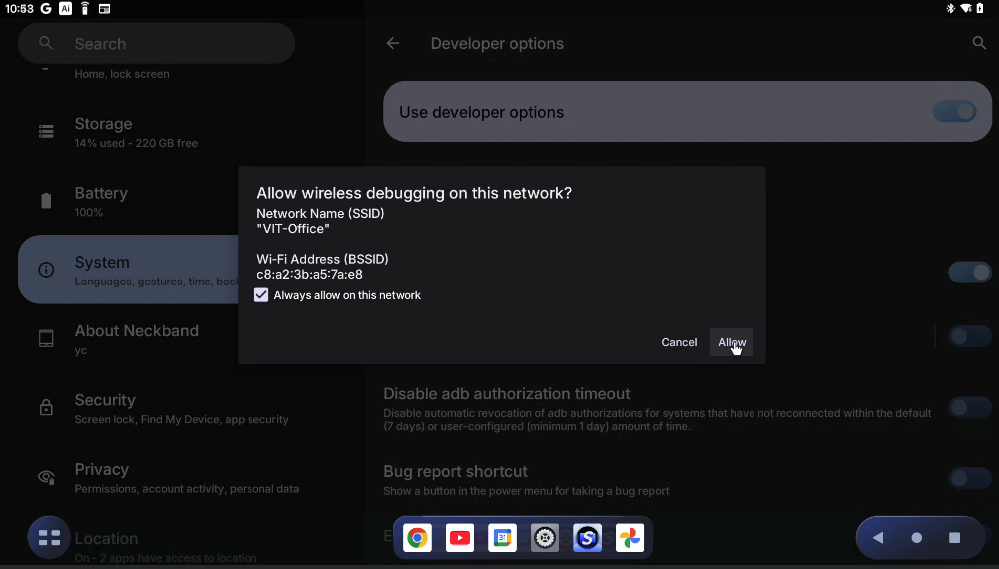
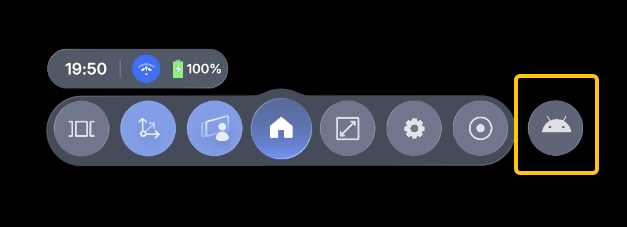
Important Note: The wireless debugging prompt cannot be clicked using hand tracking in SpaceWalker mode. If you encounter this situation, you have two options to proceed:
With wireless debugging now enabled, go to System > Developer options > Wireless debugging and tap Pair device with pairing code to display the pairing panel.
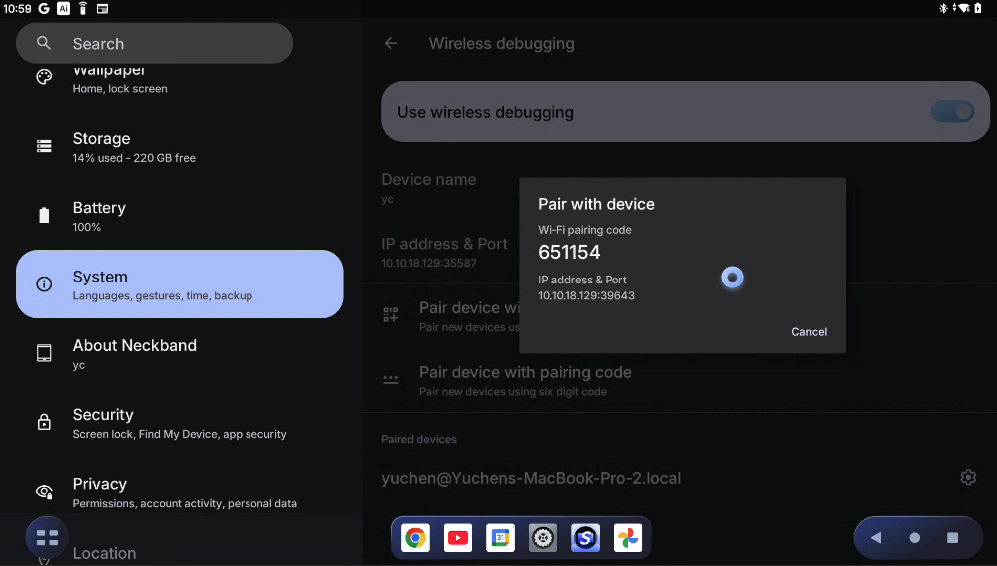
Pair and connect using ADB commands in your terminal, and then install your APK:
# Pair with the device (one-time setup)adb pair <IP_ADDRESS>:<PAIRING_PORT># Enter the pairing code when prompted# Connect to the deviceadb connect <IP_ADDRESS>:<PORT># Install your APKadb install path/to/your/app.apk
Once installed successfully, launch SpaceWalker on your VITURE neckband and find your app to enter the demo scene!