VITURE Unity XR SDK Documentation
Overview
The VITURE Unity XR SDK enables developers to create immersive XR experiences for VITURE devices.
Key features include:
Build immersive XR apps, games, or enterprise solutions using existing assets and workflows you're already familiar with.
Requirements
Development Environment:
Hardware:
Supported Glasses:
Getting Started
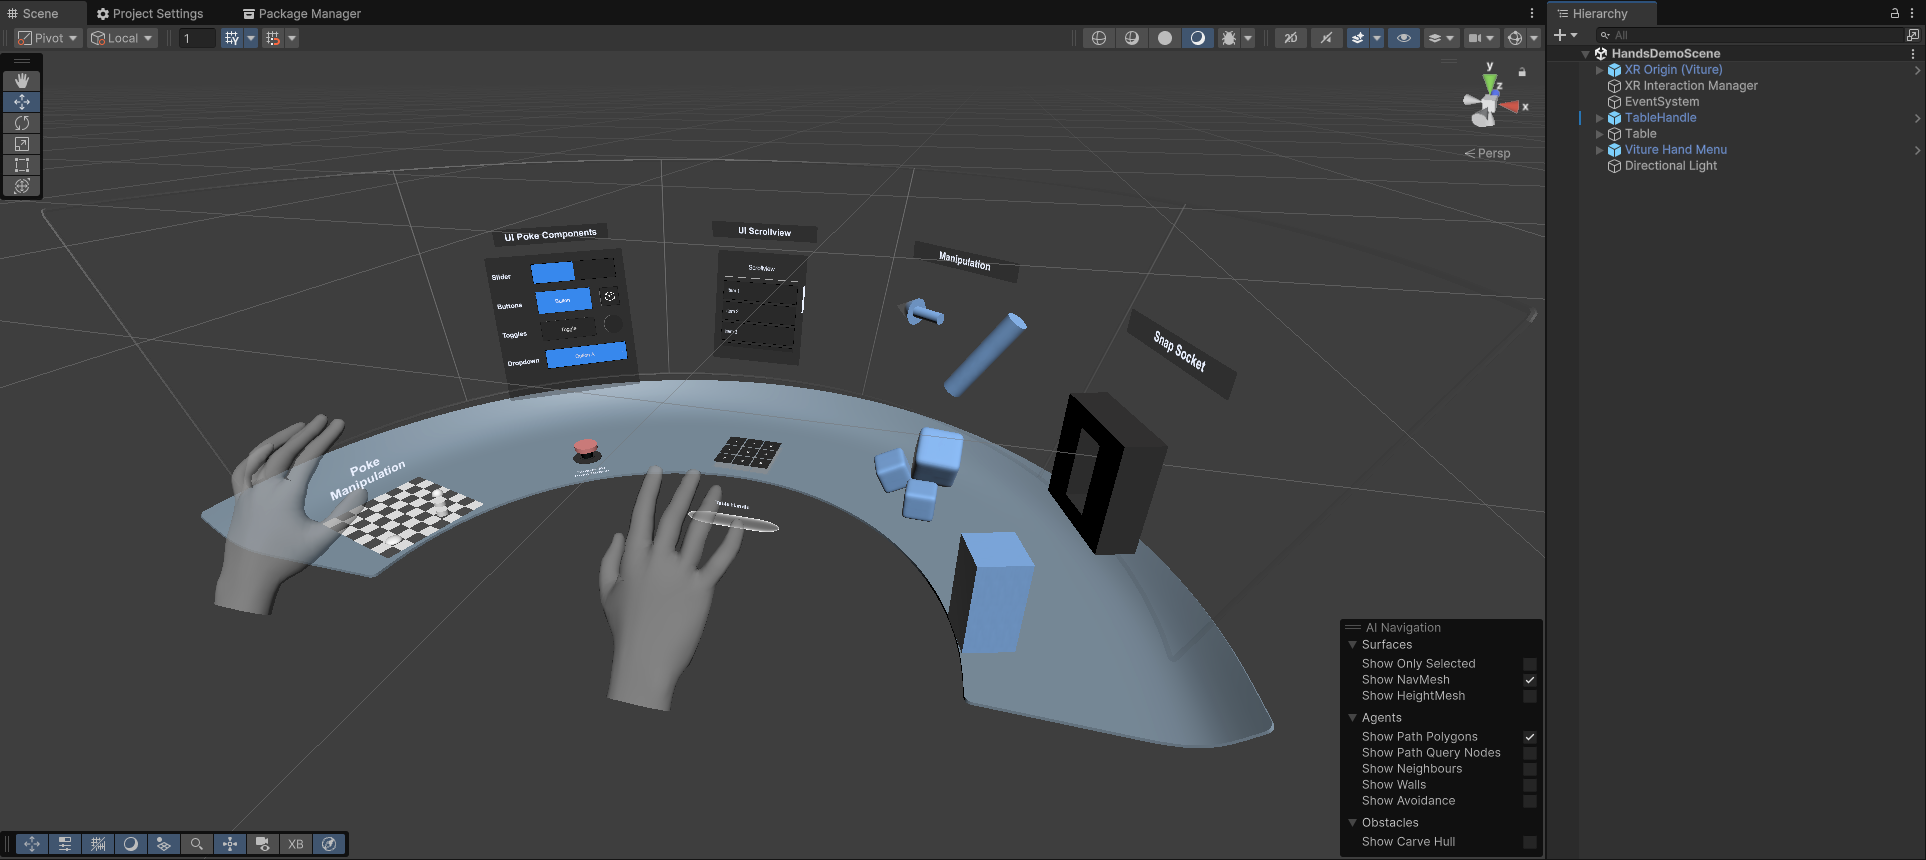
By following this quick start guide, you'll build an interactive demo scene showcasing different types of hand interactions on VITURE devices.
Unity's XR Interaction Toolkit (XRI) already provides a comprehensive hands interaction demo with three major interactors: near-field direct interactor and poke interactor for close-range objects, plus far-field ray interactor for distant targets. The original sample scene uses XRI's default input actions, we'll replace those with VITURE-specific inputs to make all interactors work seamlessly with VITURE hand tracking.
Prerequisites
Before getting started, ensure you have downloaded the VITURE Unity XR SDK (com.viture.xr) and have the following tools installed:
Project Setup
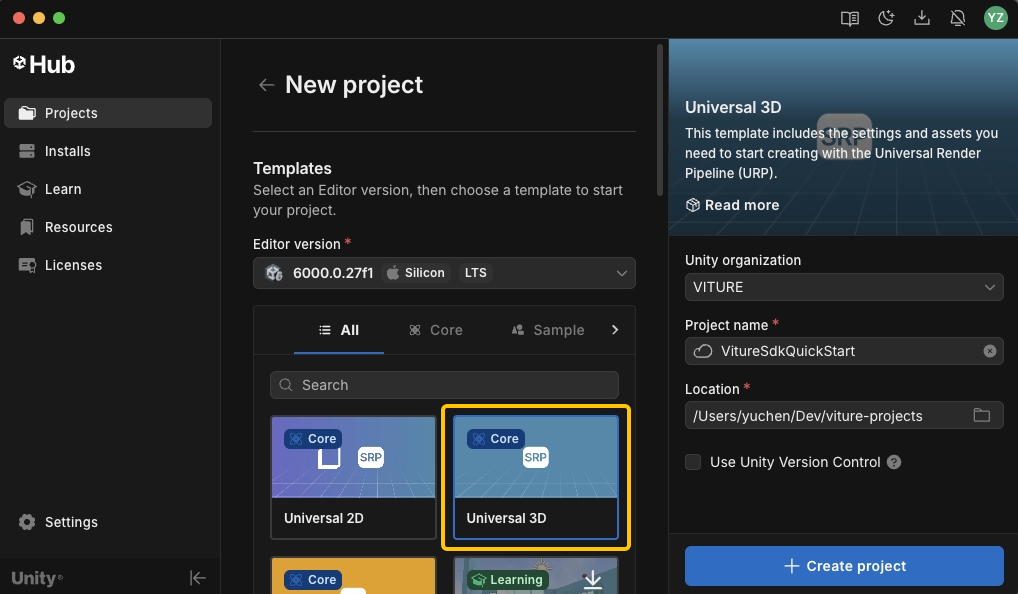
Create a new Unity project using the Universal 3D template. While URP isn't mandatory, we highly recommend it for all VITURE XR projects.
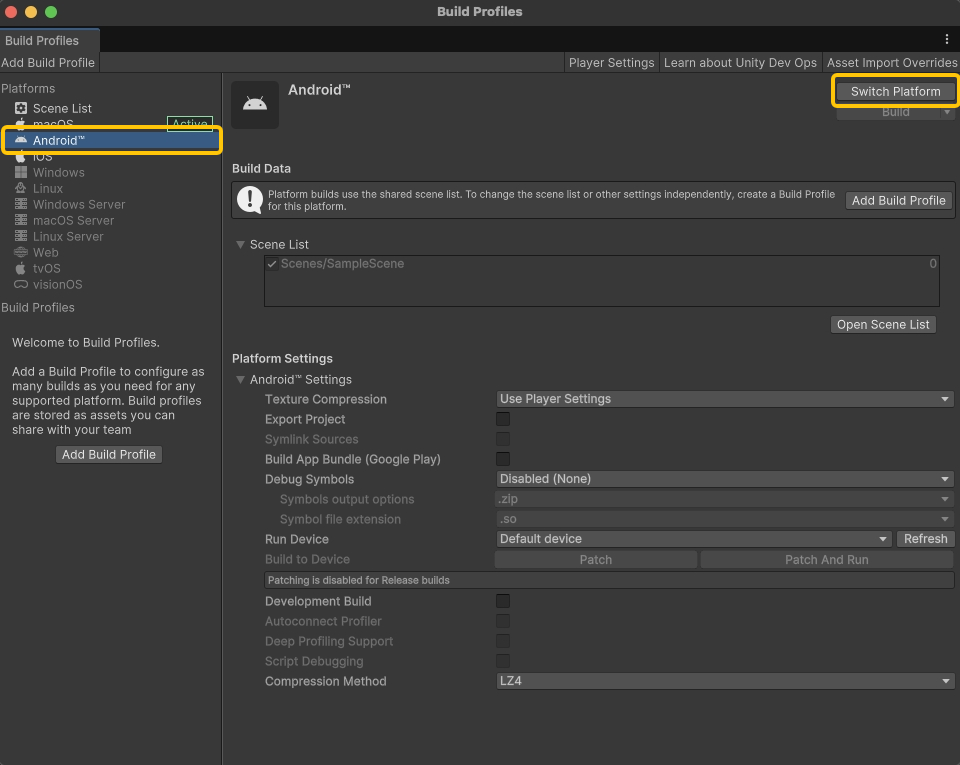
After the project is created, navigate to File > Build Profiles and switch the platform to Android.
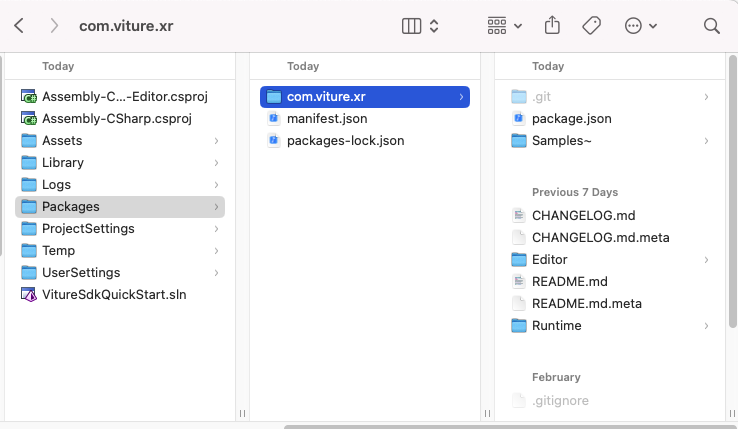
Extract the VITURE Unity XR SDK (com.viture.xr-x.x.x.zip) and copy the com.viture.xr folder into your project's Packages directory.
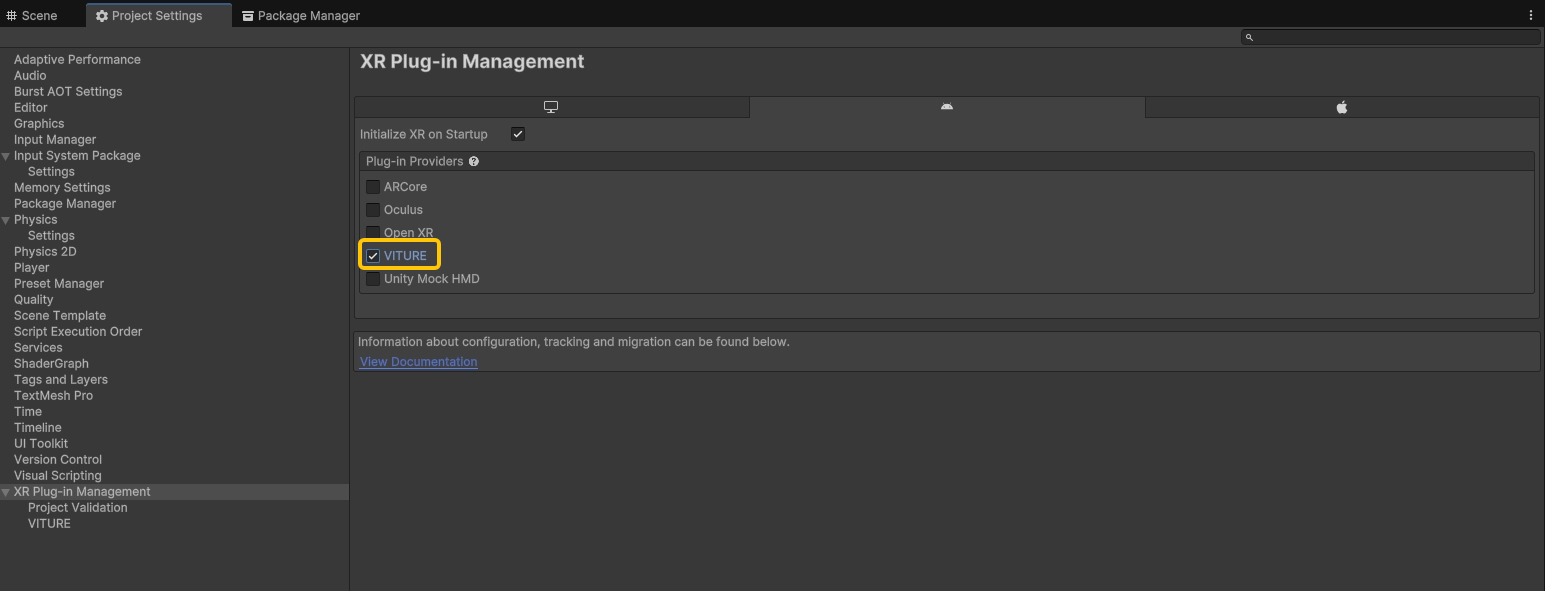
Go to Edit > Project Settings > XR Plug-in Management and enable VITURE.
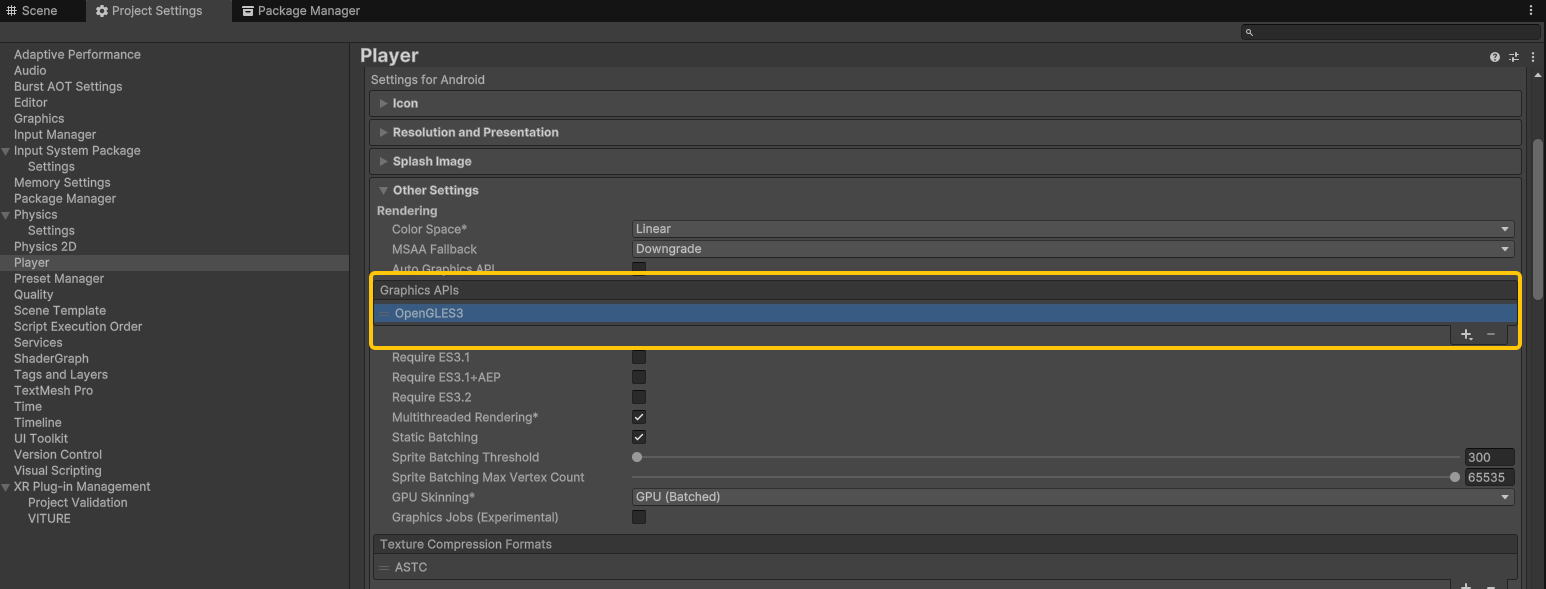
Navigate to Edit > Project Settings -> Player -> Other Settings -> Rendering and set OpenGLES3 as the only Graphics API. Vulkan support is planned for future releases.
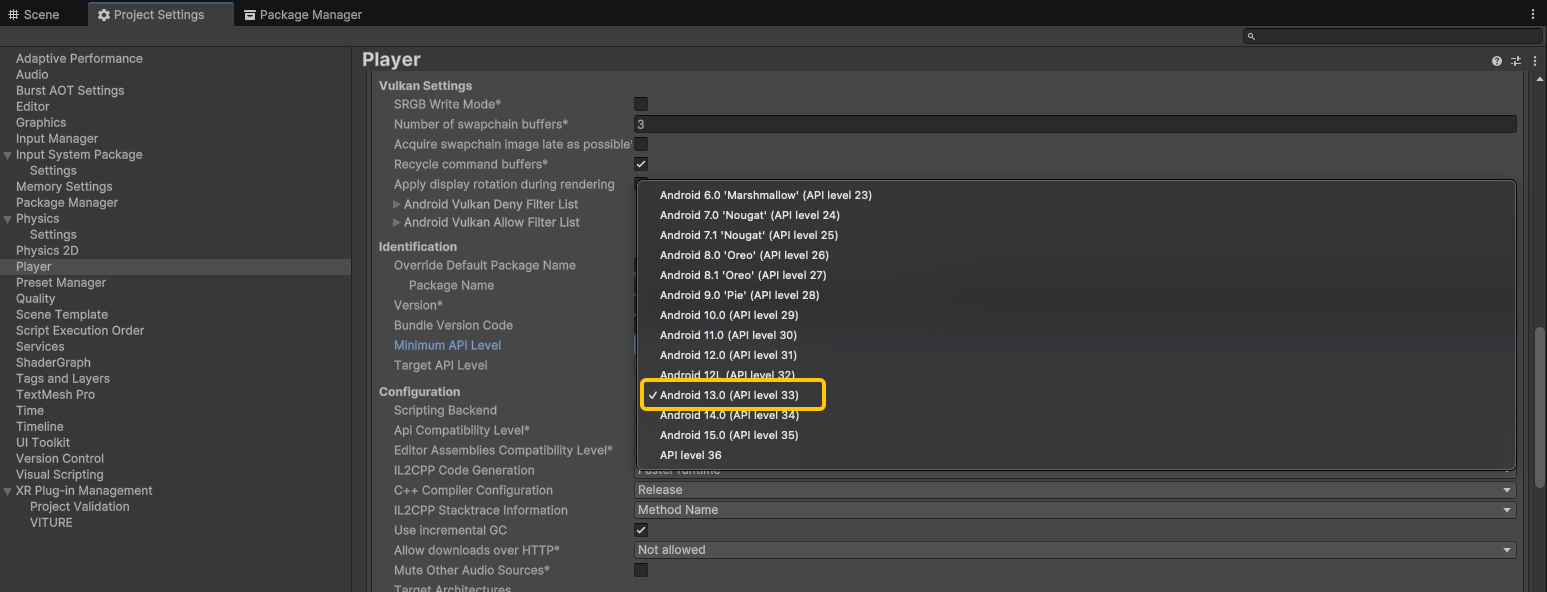
Next, go to Edit -> Project Settings -> Player -> Other Settings -> Identification and set Minimum API Level to Android 13.0 (API level 33).
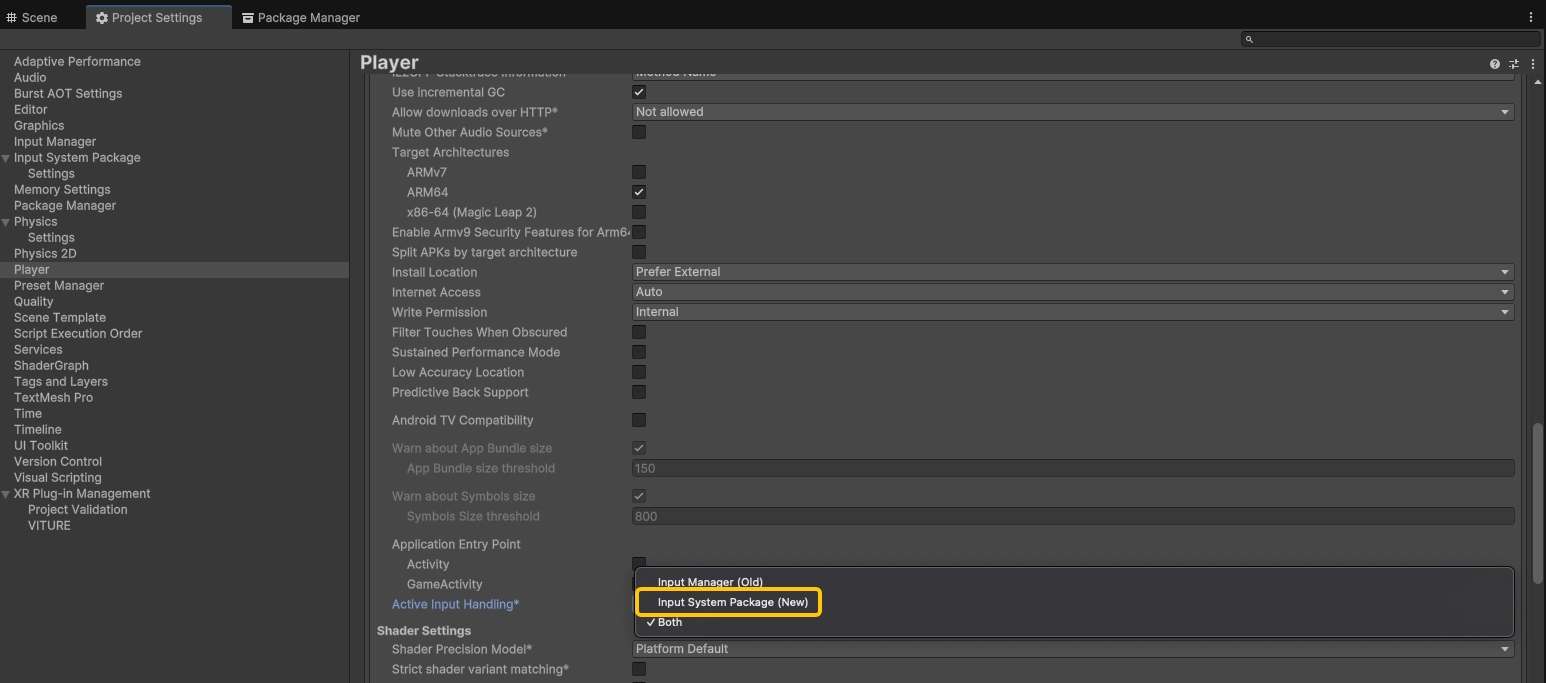
Finally, navigate to Edit -> Project Settings -> Player -> Other Settings -> Configuration and set Active Input Handling to Input System Package (New). Unity will prompt to restart—click Apply to proceed.
Your project is now configured to VITURE XR development. Next, we'll import the sample assets and build an interactive demo scene!
Import Required Samples
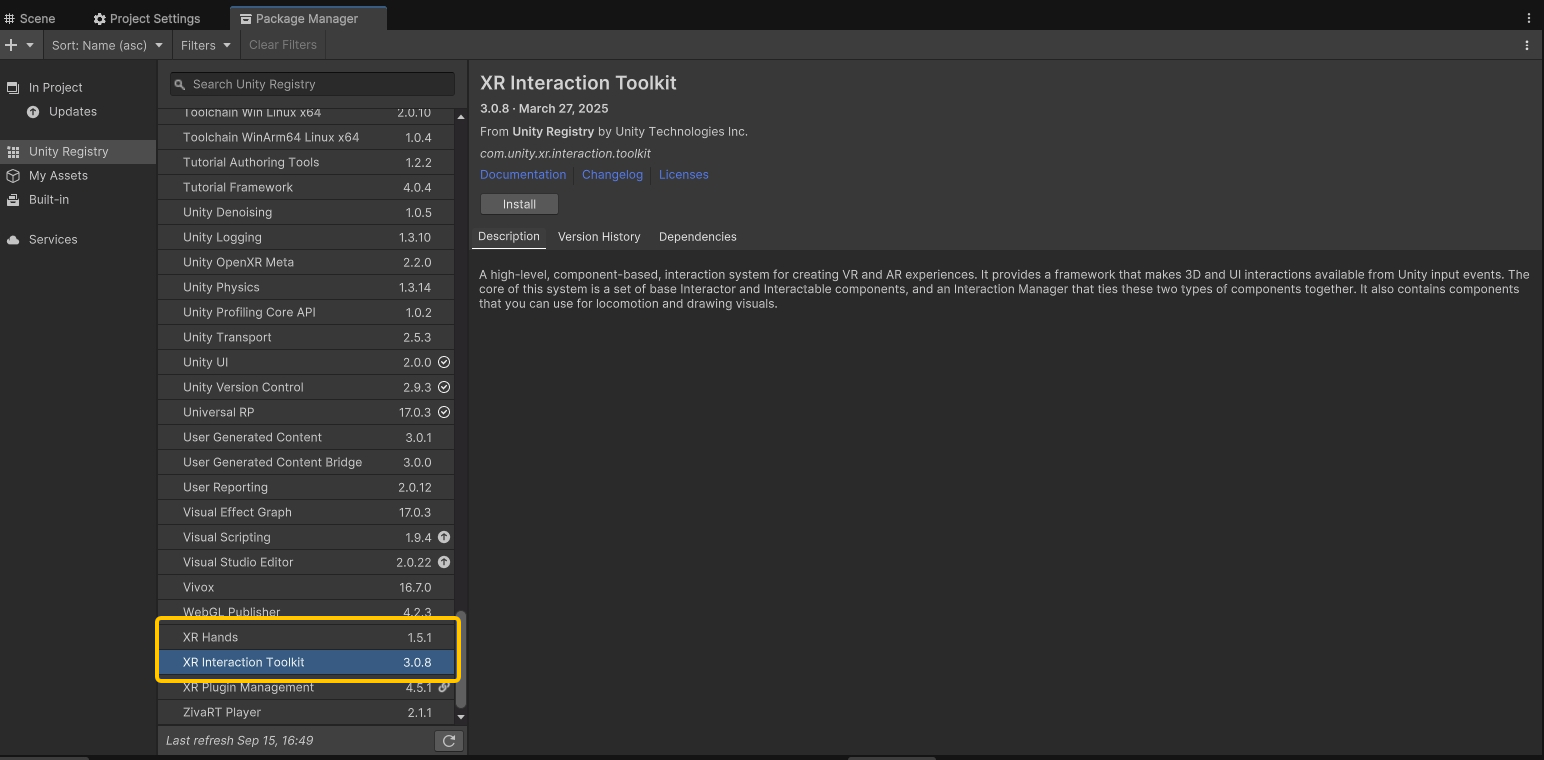
Navigate to Window > Package Manager > Unity Registry and install XR Interaction Toolkit and XR Hands.
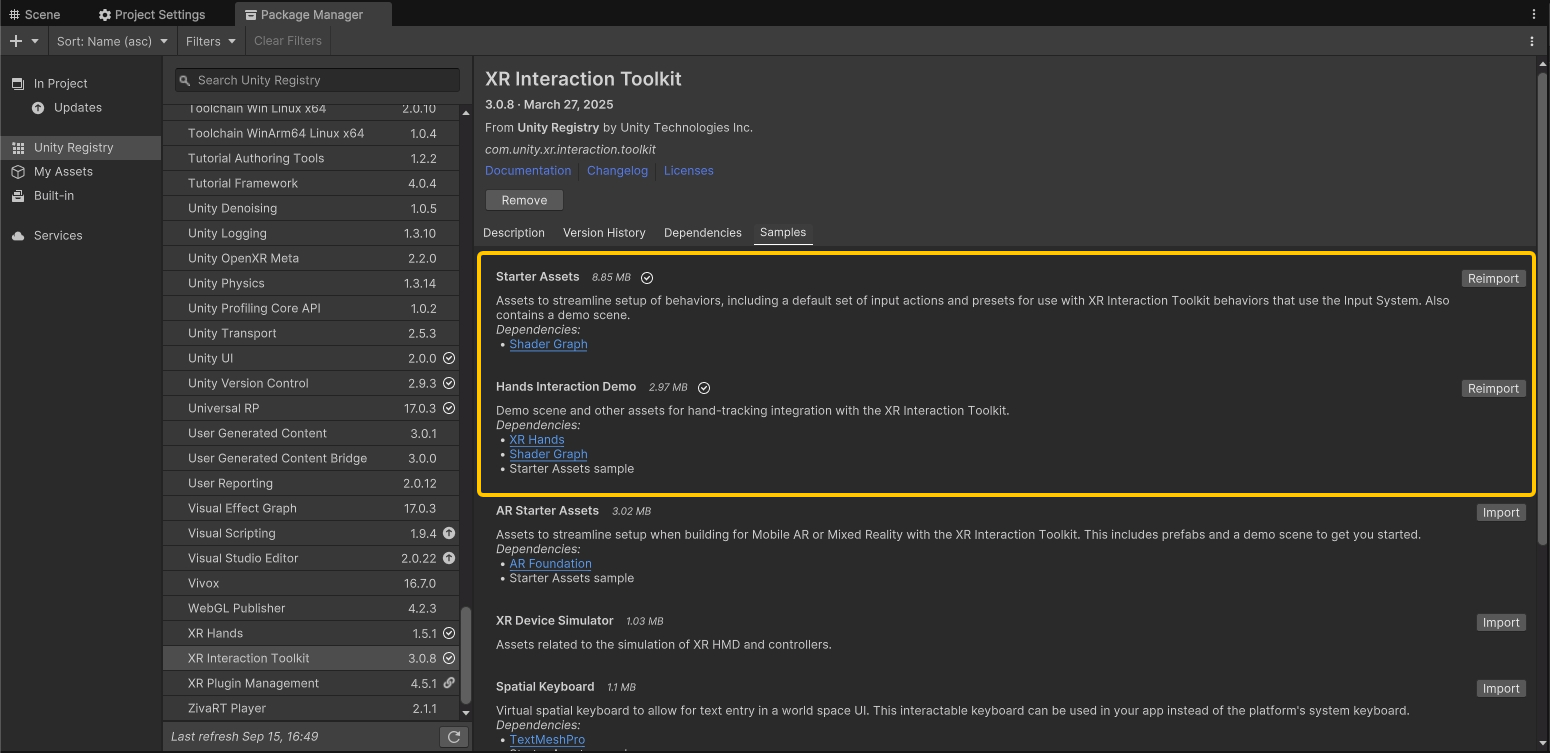
From the XR Interaction Toolkit package, import the Starter Assets and Hands Interaction Demo samples.
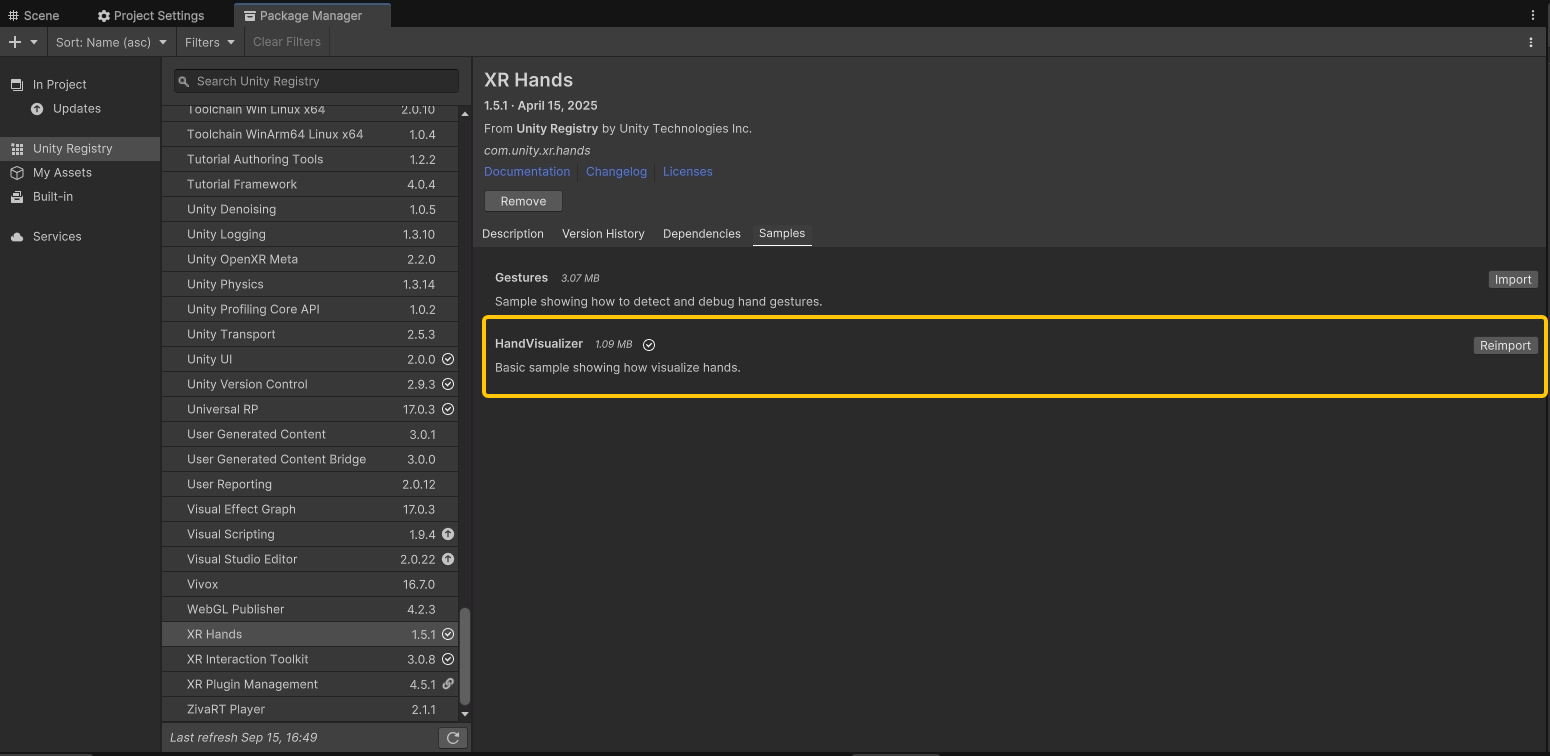
From the XR Hands package, import the HandVisualizer sample.
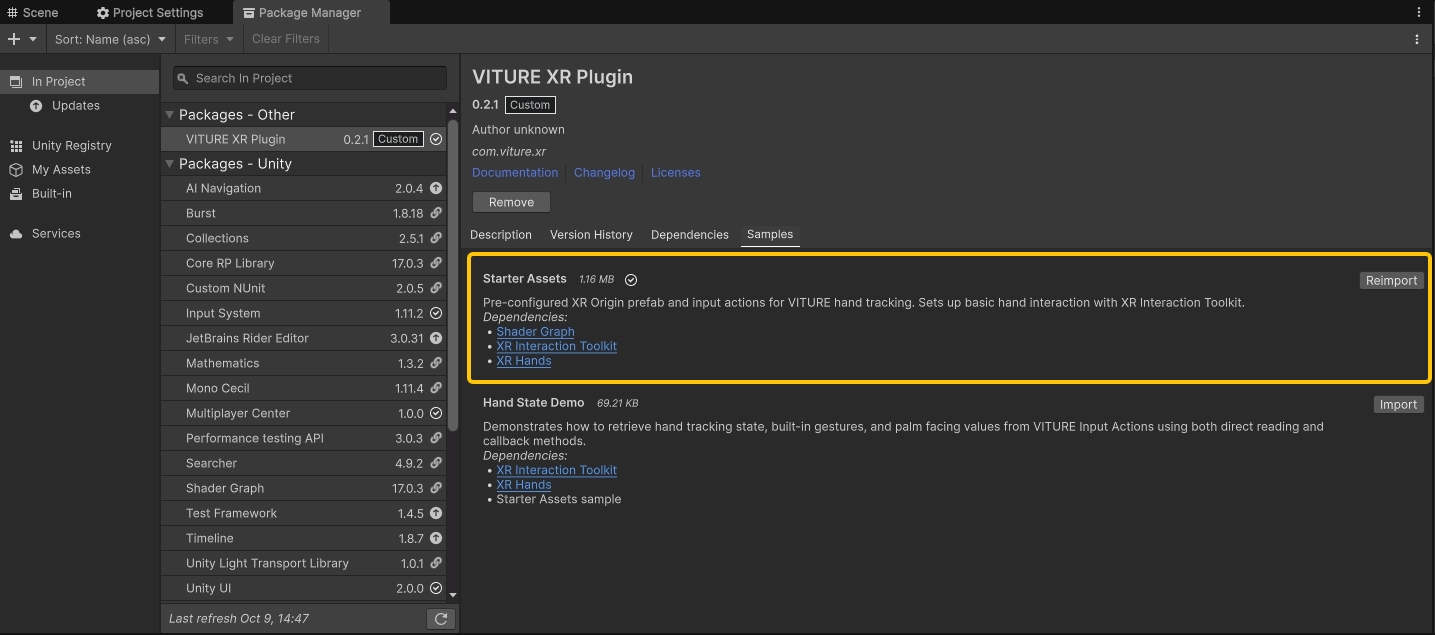
Finally, go to Window > Package Manager > In Project > VITURE XR Plugin and import the Starter Assets sample.
Configure Demo Scene for VITURE Input
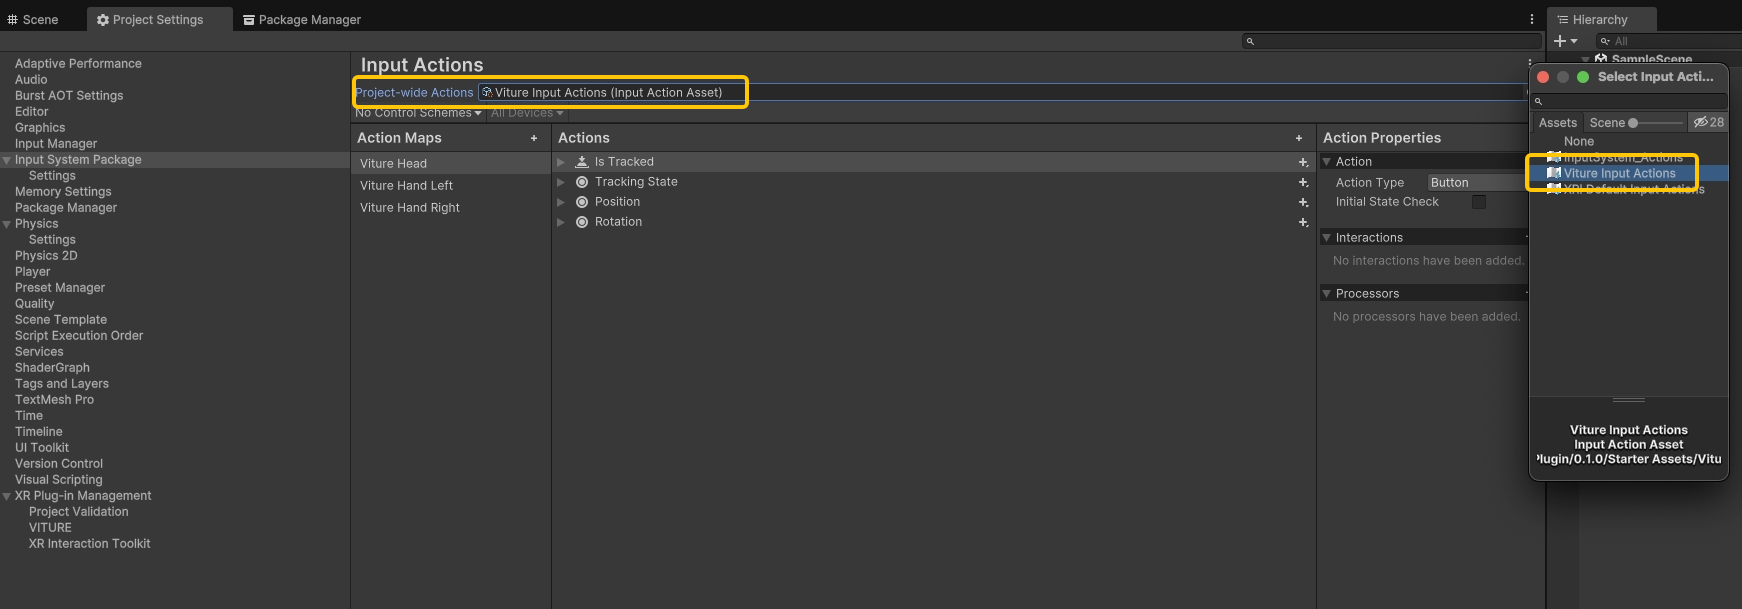
Go to Edit > Project Settings > Input System Package and set Project-wide Actions to Viture Input Actions.
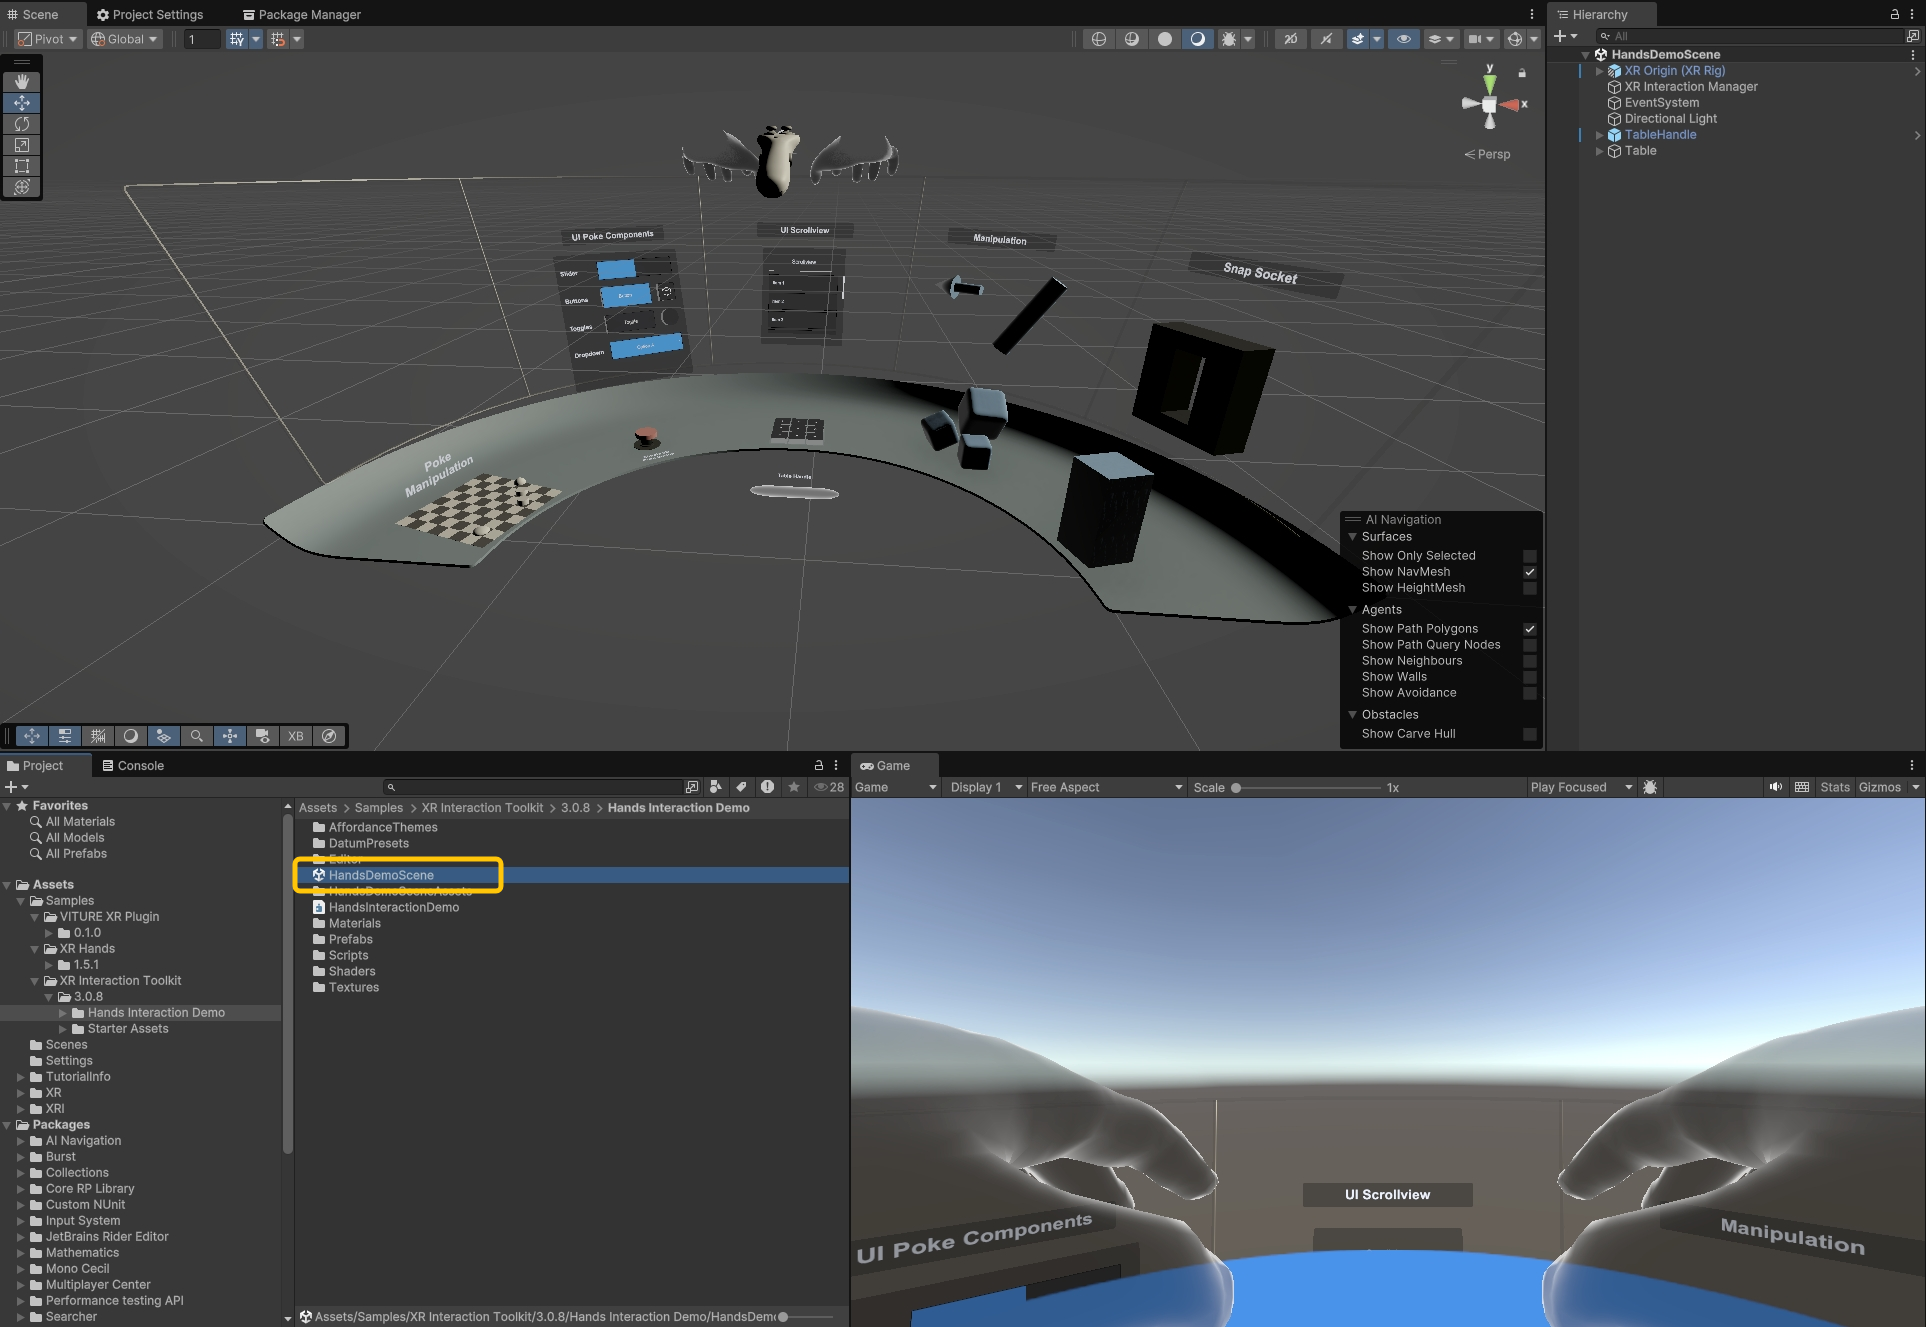
Navigate to Assets > Samples > XR Interaction Toolkit > 3.0.8 > Hands Interaction Demo and open the demo scene. This scene uses default XRI input actions that we need to replace with VITURE-specific ones.
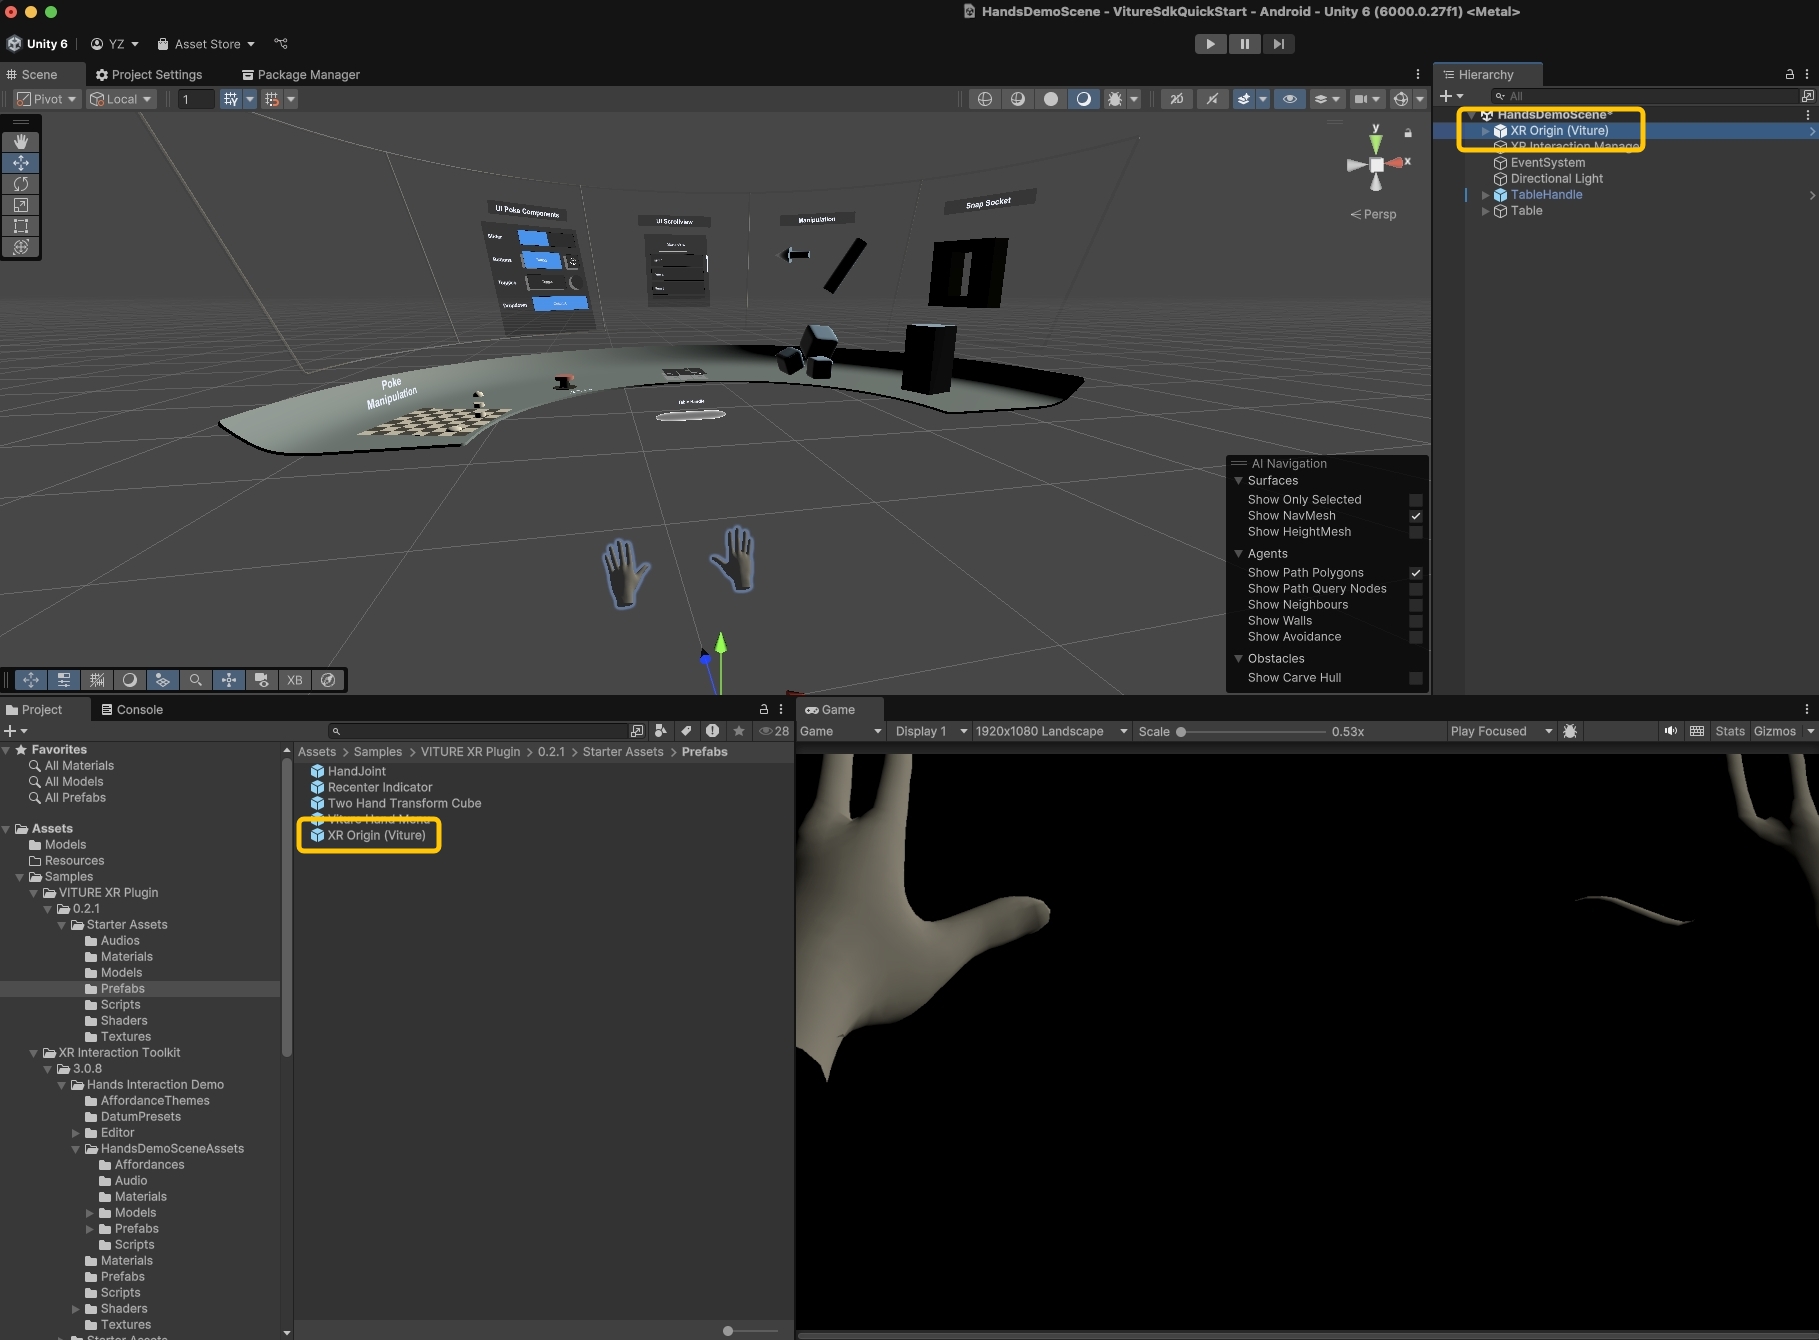
Delete the existing XR Origin (XR Rig) from the scene hierarchy. Replace it by dragging XR Origin (Viture) from Assets > Samples > VITURE XR Plugin > 0.1.0 > Starter Assets > Prefabs into the scene.
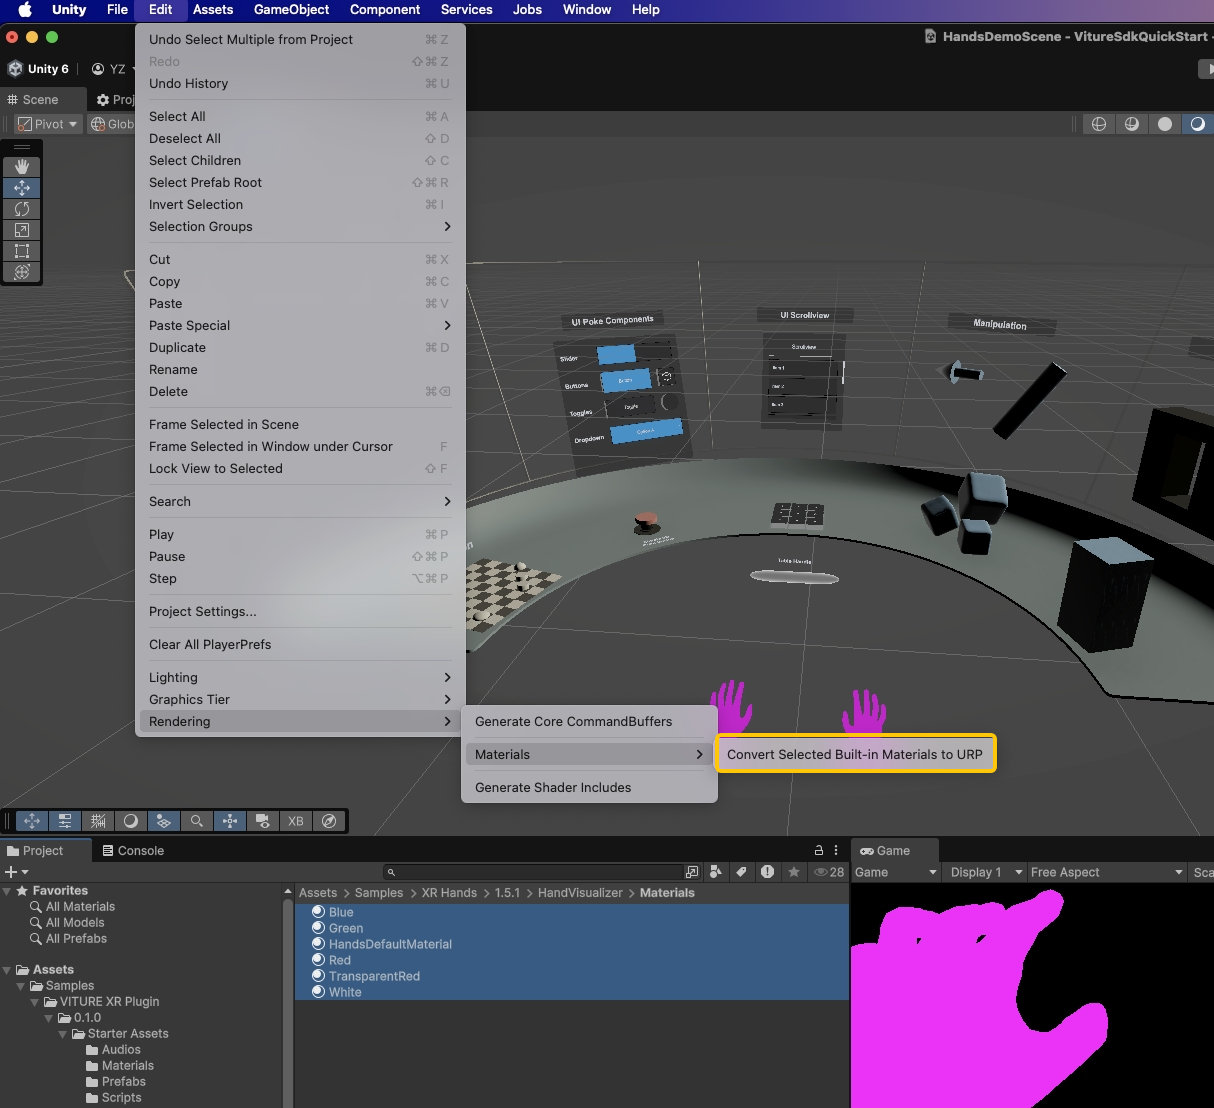
The hand materials need to be converted from Built-in Render Pipeline to URP for proper rendering. Navigate to Assets > Samples > XR Hands > 1.5.1 > HandVisualizer > Materials, select all materials, then go to Edit > Rendering > Materials > Convert Selected Built-in Materials to URP.
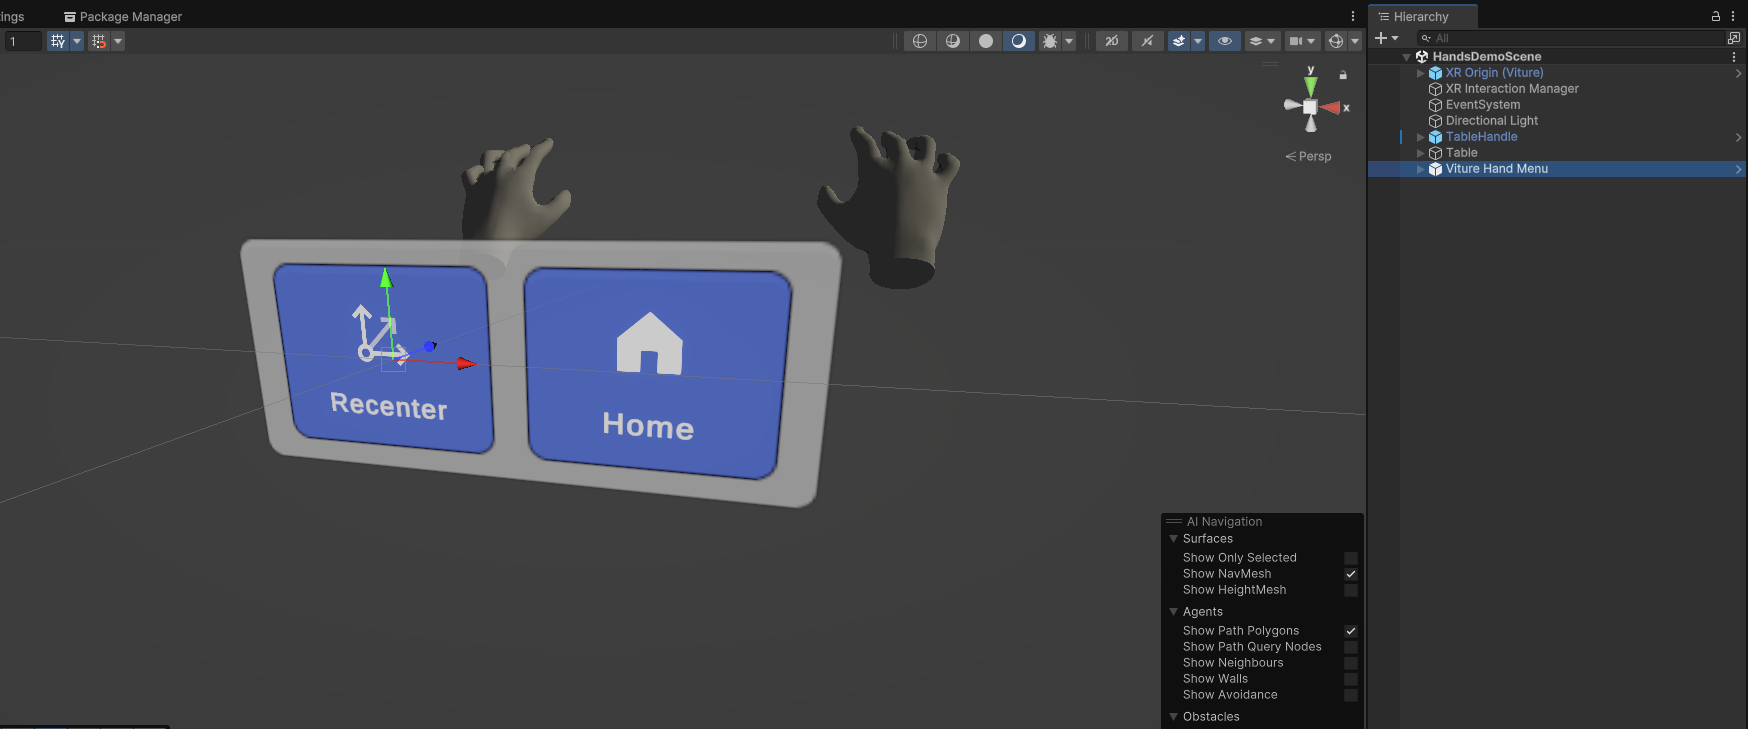
Drag the Viture Hand Menu prefab from Assets > Samples > VITURE XR Plugin > 0.1.0 > Starter Assets > Prefabs into your scene. When prompted, click Import TMP Essentials to add Unity's advanced text rendering system.
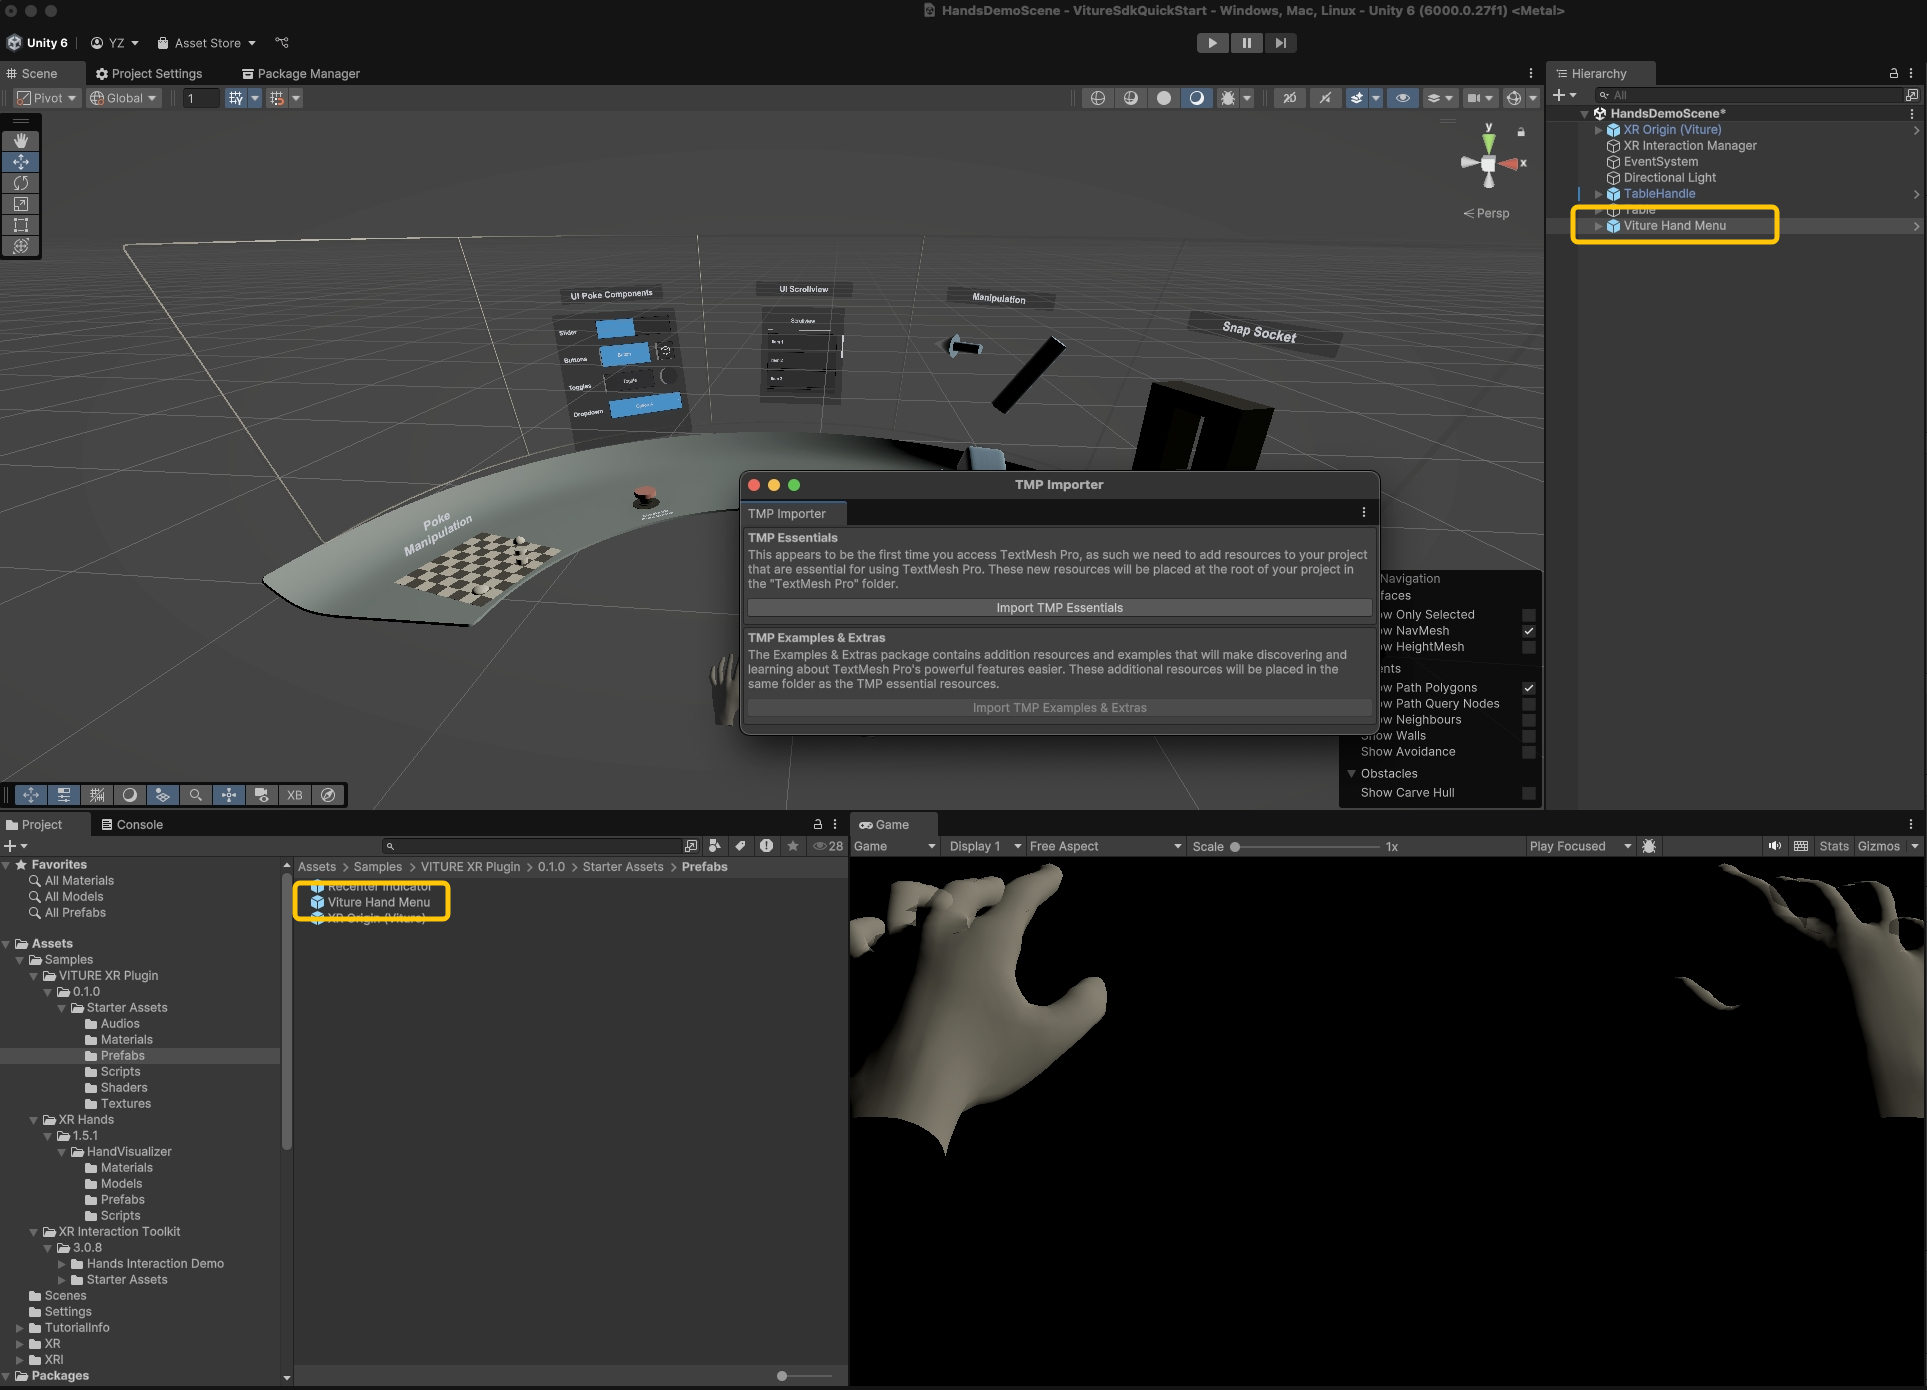
The Viture Hand Menu provides essential system functions—Recenter (resets XR coordinate origin) and Home (exits to launcher)—that we highly recommend including in all VITURE XR applications.
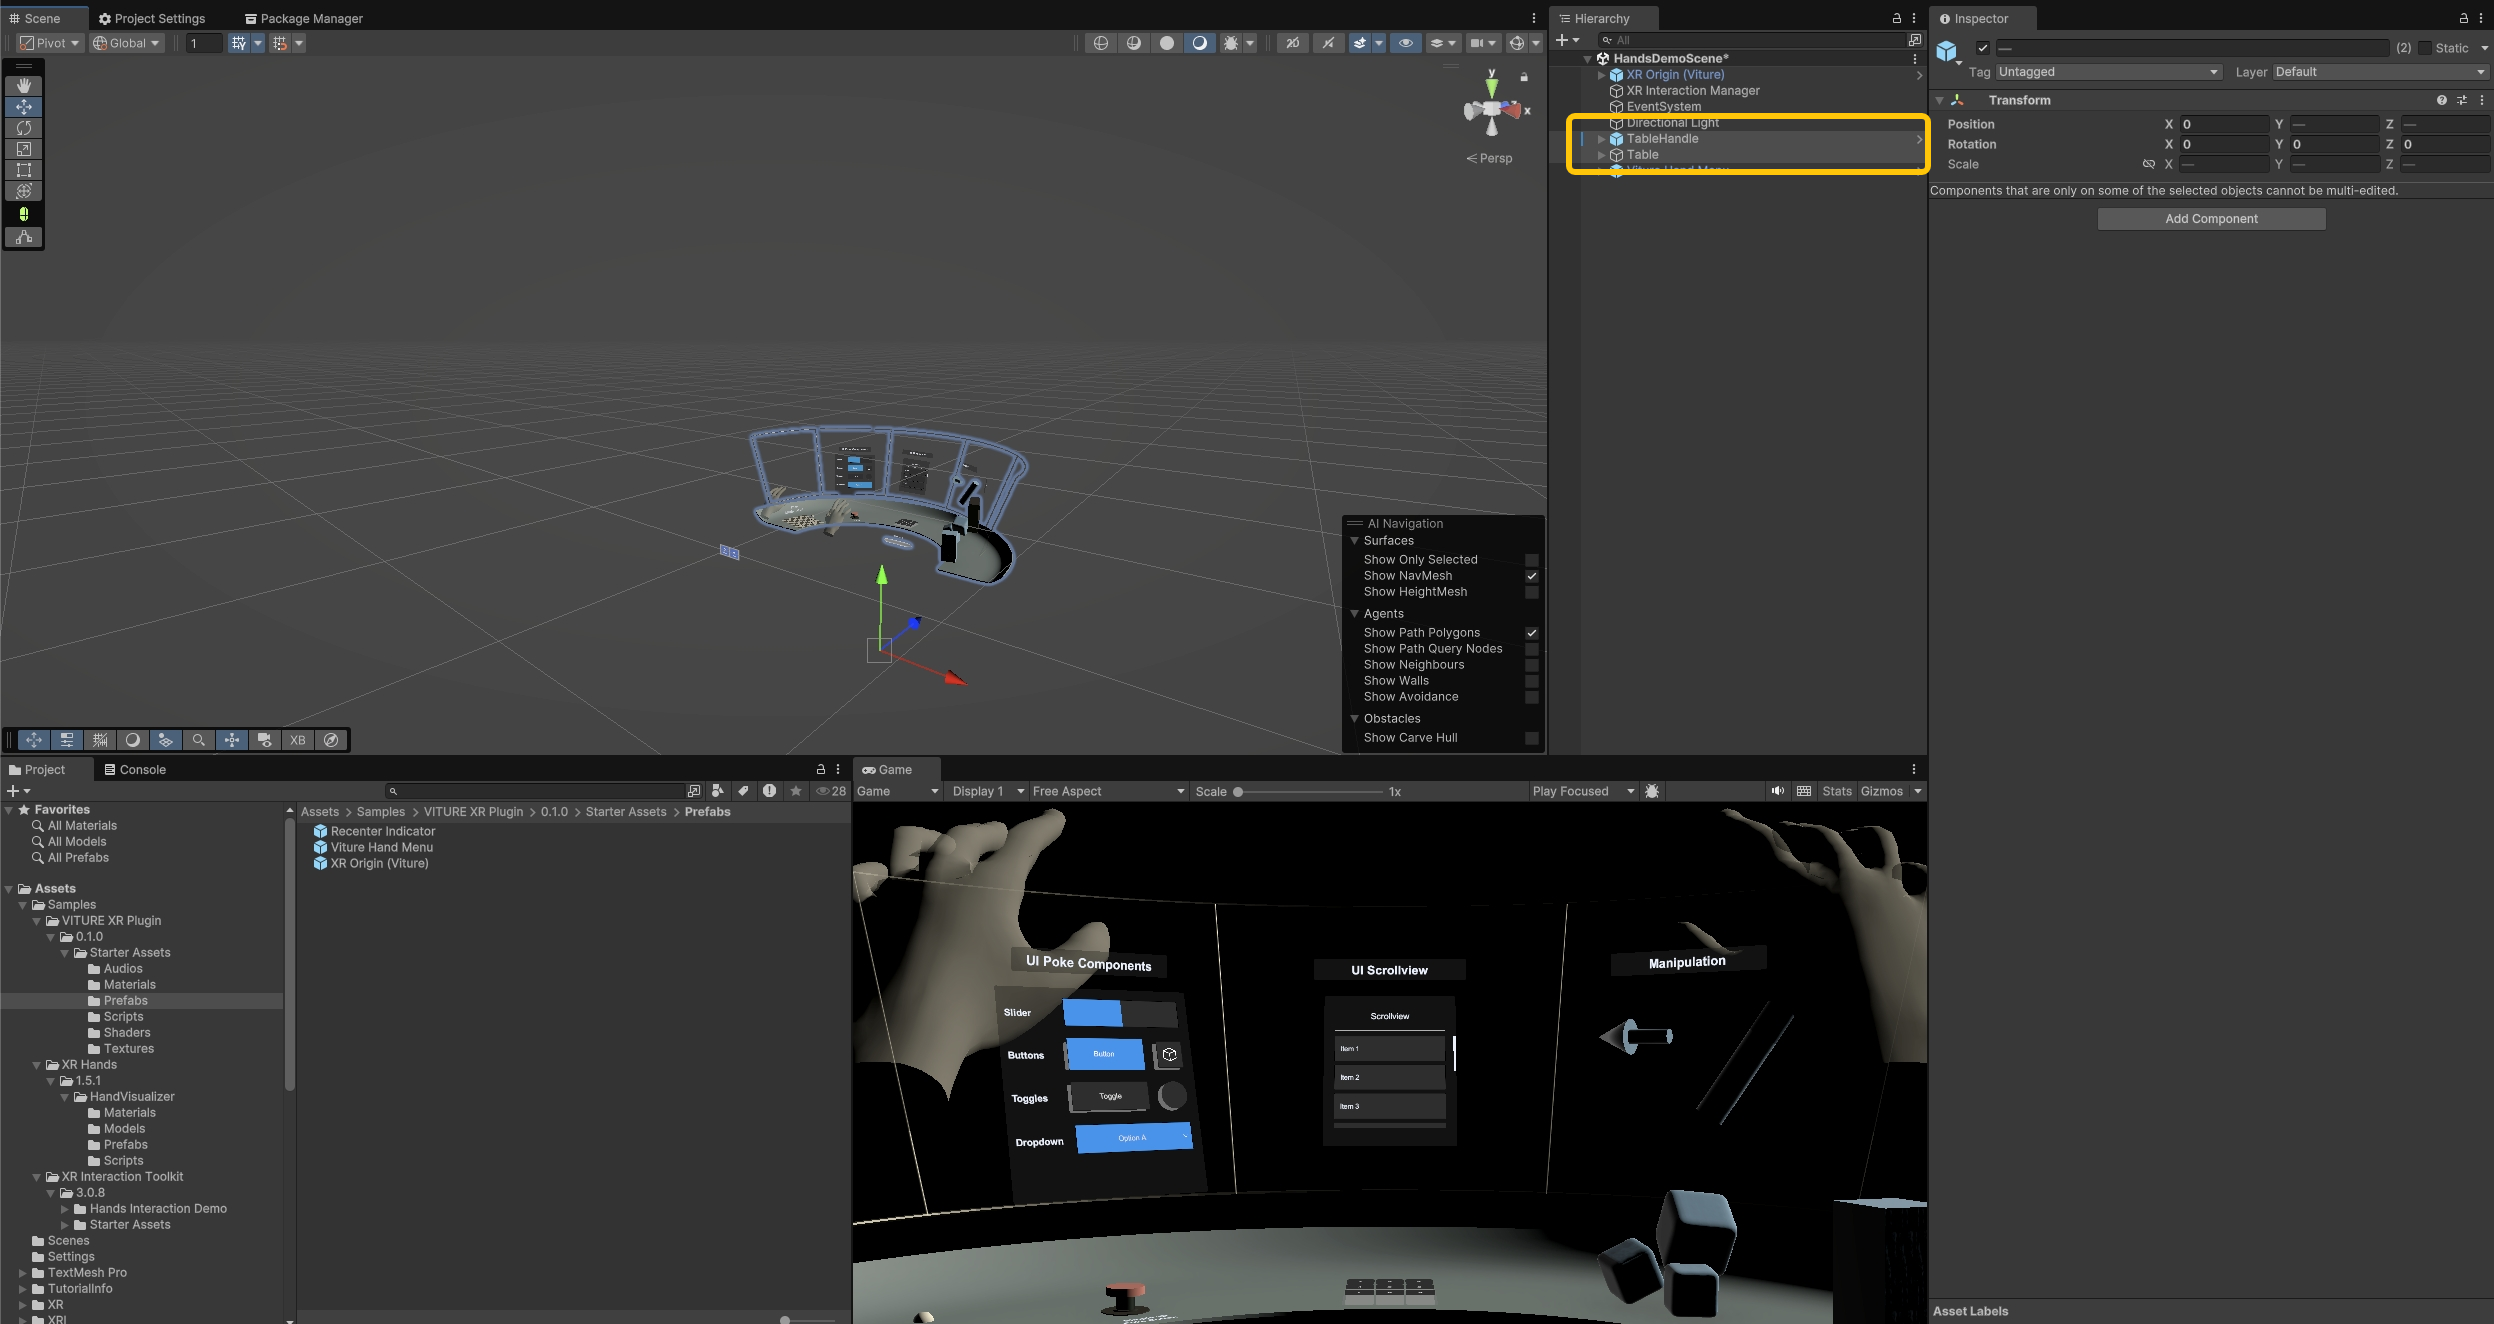
The default table position is too high for comfortable interaction. Select both TableHandle and Table in the Scene Hierarchy and move them lower and forward for better accessibility.
The default Directional Light is a bit dim for the demo. Delete it and create a new Directional Light to brighten up the scene.
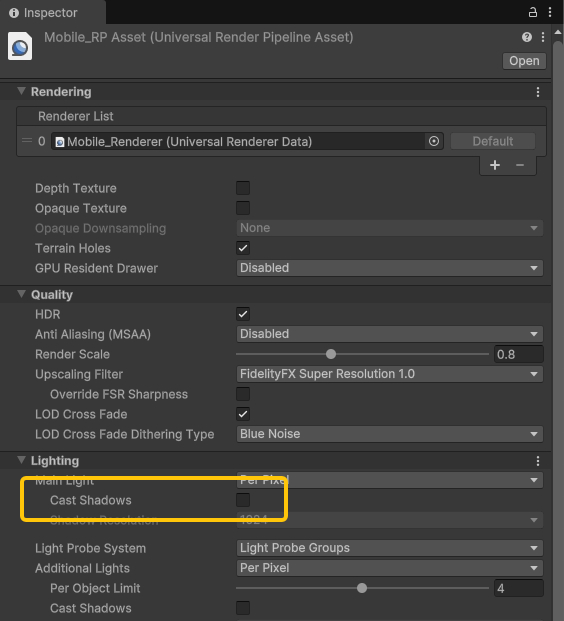
For optimal performance, we recommend disabling shadows in your URP settings. Navigate to Assets > Settings > Mobile_RPAsset and disable the Cast Shadows option.
Build APK
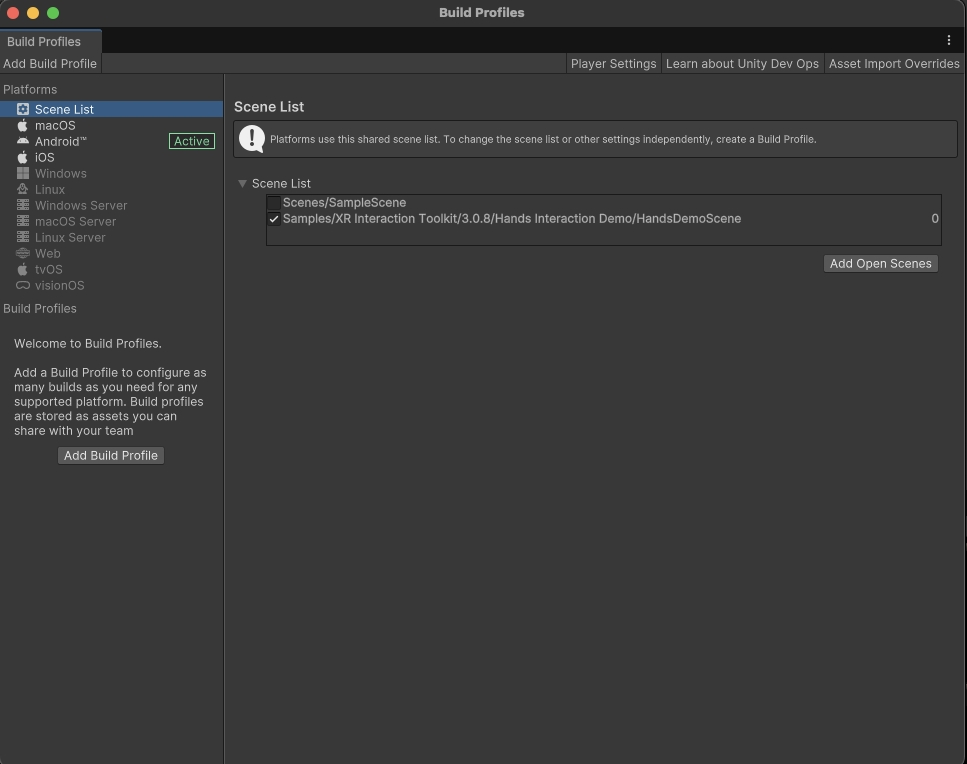
Go to File > Build Profiles > Scene List and click Add Open Scenes to include only the HandsDemoScene in your build.
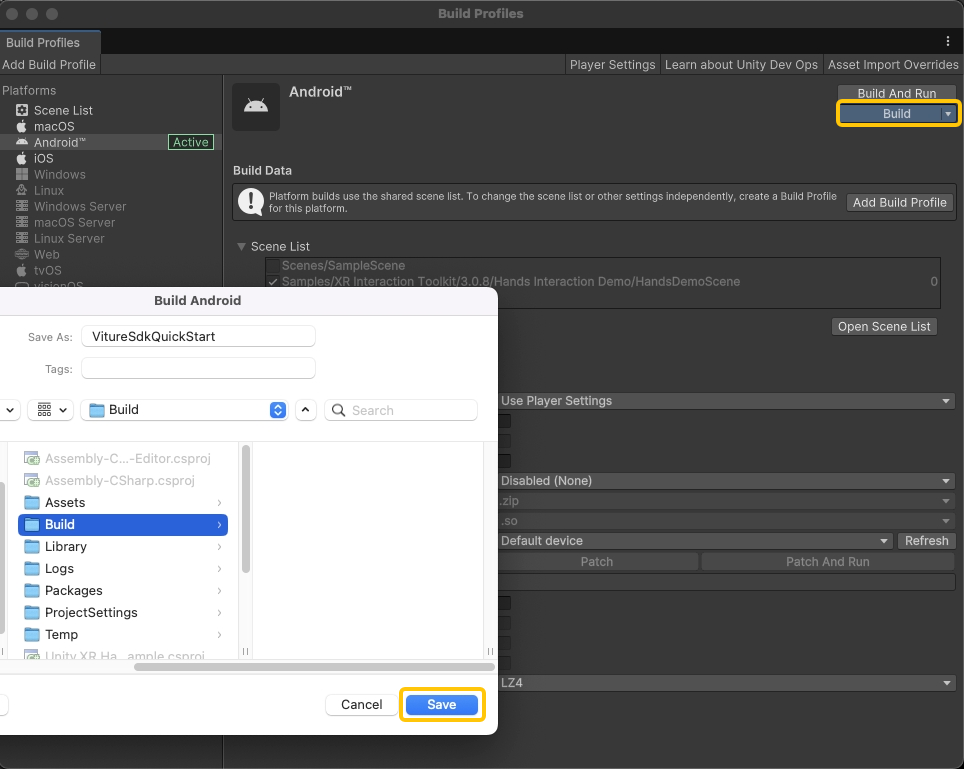
Click Build, create a Build folder, name your APK, and click Save to start the build process.
Congratulations! 🎉 You've built your first VITURE XR application.
Deploy to Device
First, ensure ADB (Android Debug Bridge) is installed on your computer.
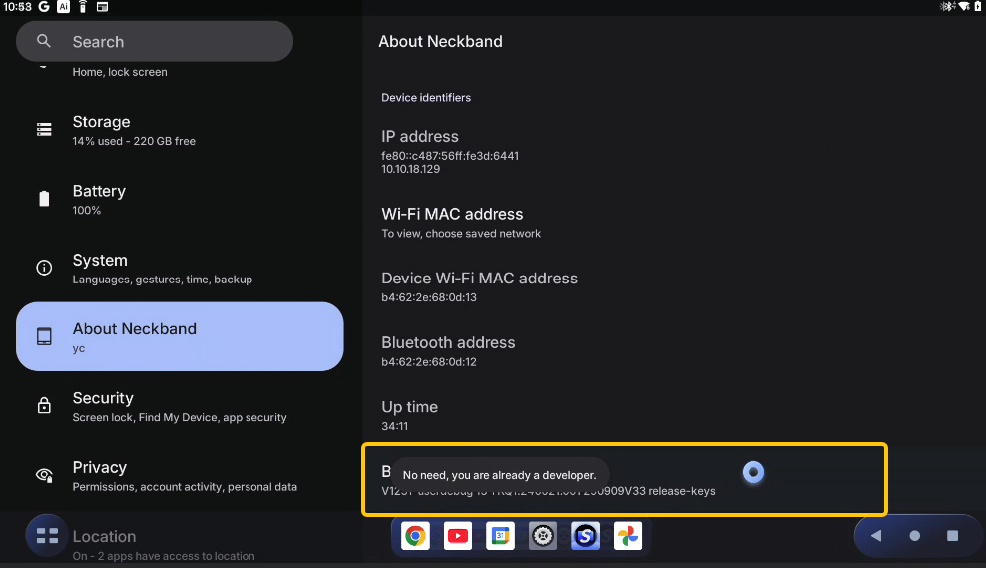
Enable Developer Mode by opening Settings and navigating to About Neckband > Build number. Tap the Build number area 7 times to unlock Developer Mode.
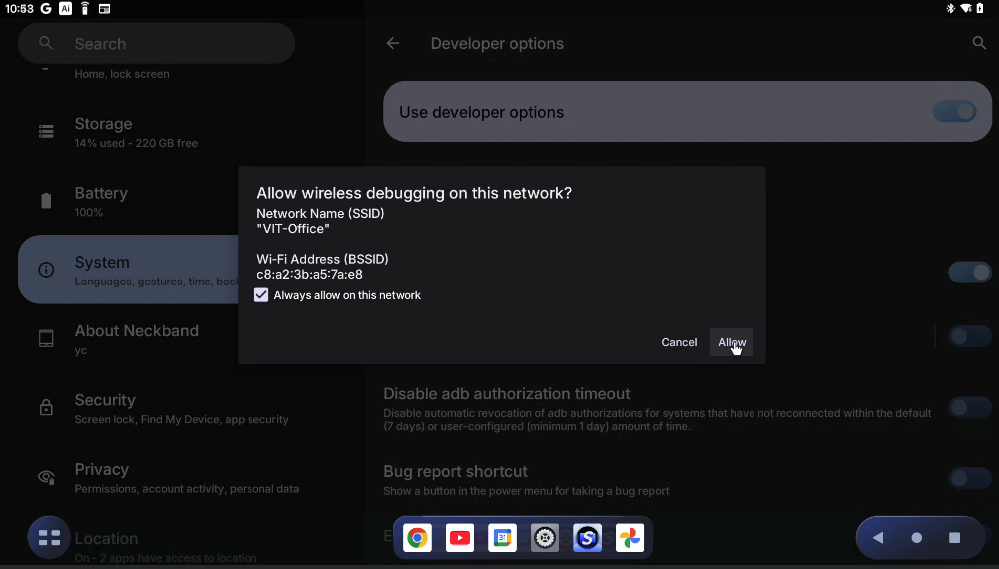
Navigate to System > Developer options and enable Wireless debugging. Click Allow when prompted.
Go to System > Developer options > Wireless debugging and tap Pair device with pairing code to display the pairing panel.
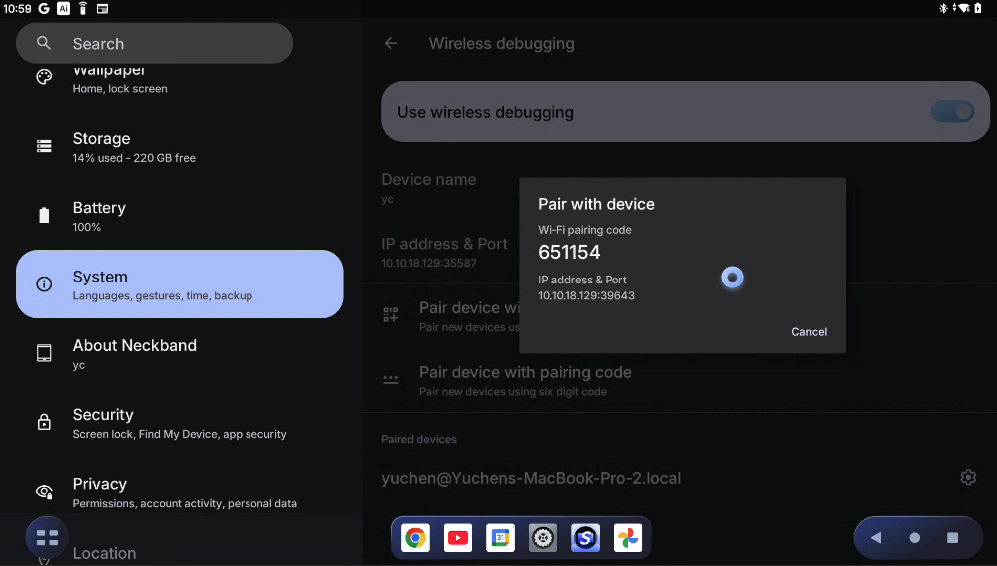
Pair and connect using ADB commands in your terminal, and then install your APK:
# Pair with the device (one-time setup)adb pair <IP_ADDRESS>:<PAIRING_PORT># Enter the pairing code when prompted# Connect to the deviceadb connect <IP_ADDRESS>:<PORT># Install your APKadb install path/to/your/app.apk
Once installed successfully, launch SpaceWalker on your VITURE neckband and find your app to enter the demo scene!
VitureXR API
VitureXR is the SDK's central hub providing static access to VITURE XR functionality. All APIs are organized into logical categories for easy discovery and use.
Glasses
Provides information about connected VITURE glasses.
GetGlassesModel()
Gets the model of the currently connected VITURE glasses.
Returns: Connected model, or VitureGlassesModel.Unknown if no glasses are connected.
Supported Models:
VitureGlassesModel.One - Includes VITURE One and VITURE One Lite glasses.VitureGlassesModel.Pro - VITURE Pro glasses.VitureGlassesModel.Luma - Includes VITURE Luma and VITURE Luma Pro glasses.VitureGlassesModel.LumaUltra - VITURE Luma Ultra glasses.Head Tracking
Controls head tracking functionality and provides device capability information.
GetHeadTrackingCapability()
Gets the head tracking capability of the currently connected glasses.
Returns: Head tracking capability based on the connected glasses model:
VitureHeadTrackingCapability.ThreeDoF - 3 degrees of freedom (rotation only)VitureHeadTrackingCapability.SixDoF - Full 6 degrees of freedom (position + rotation)ResetOrigin()
Resets the head tracking origin to the current head position and orientation. This recalibrates the tracking reference origin.
Hand Tracking
Controls the hand tracking subsystem lifecycle. Unity XR Hands package must be installed to use this feature.
Start()
Starts the VITURE XR hand subsystem.
Stop()
Stops the VITURE XR hand subsystem.
Rendering
Advanced rendering controls for performance optimization.
SetHalfFrameRate(bool enabled)
Enables or disables half frame rate rendering for performance optimization. When enabled, reduces rendering frame rate by half (e.g., 90fps to 45fps). Animation will appear less smooth.
Parameters:
enabled - True to enable half frame rate, false to disable.SetTimeWarpOnlyMode(bool enabled)
Enables or disables time warp only rendering mode. When enabled, stops Unity rendering and uses only time warp to display the last rendered frame with head tracking compensation. This is only for testing purposes.
Parameters:
enabled - True to enable time warp only mode, false to disable.Samples
Starter Assets
This sample provides pre-configured assets to streamline VITURE XR project setup. We advise importing this sample to accelerate your development workflow. Make sure to install all required dependencies and samples for everything to work properly.
Assets included:
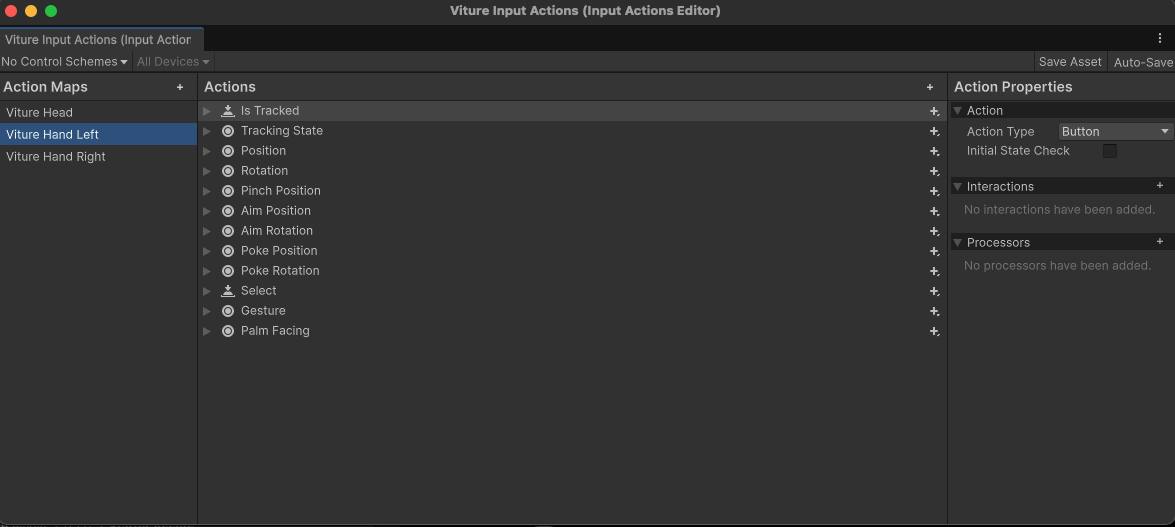
Viture Input Actions
Input Action Asset containing VITURE-specific hand tracking actions and gestures, ready to use with XR Interaction Toolkit (XRI).
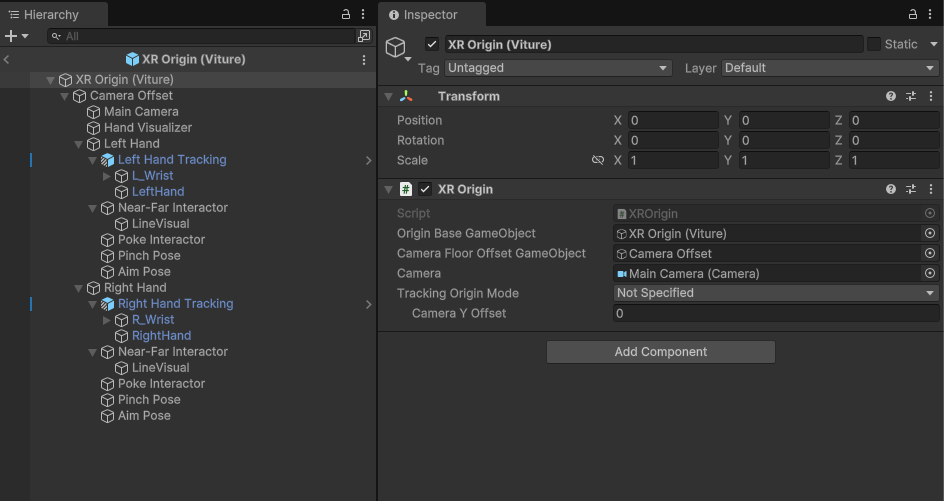
XR Origin (Viture)
Pre-configured XR Origin prefab with main camera and hand tracking components. Includes Near-Far Interactor and Poke Interactor already wired up with VITURE input actions.
Viture Hand Menu
System menu prefab that activates when you face your palm toward yourself and perform a long pinch gesture. Provides essential functions:
Add this to let users invoke system-level controls in your application.
Recenter Indicator
Circular progress bar prefab that visualizes coordinate reset countdown. Automatically integrated with the Viture Hand Menu—no manual setup required.
Two Hand Transform Cube
Demonstration prefab showcasing the TwoHandTransform script for intuitive two-handed object manipulation. Pinch with both hands simultaneously to translate, rotate, and scale the target object using natural hand gestures.
Hand State Demo
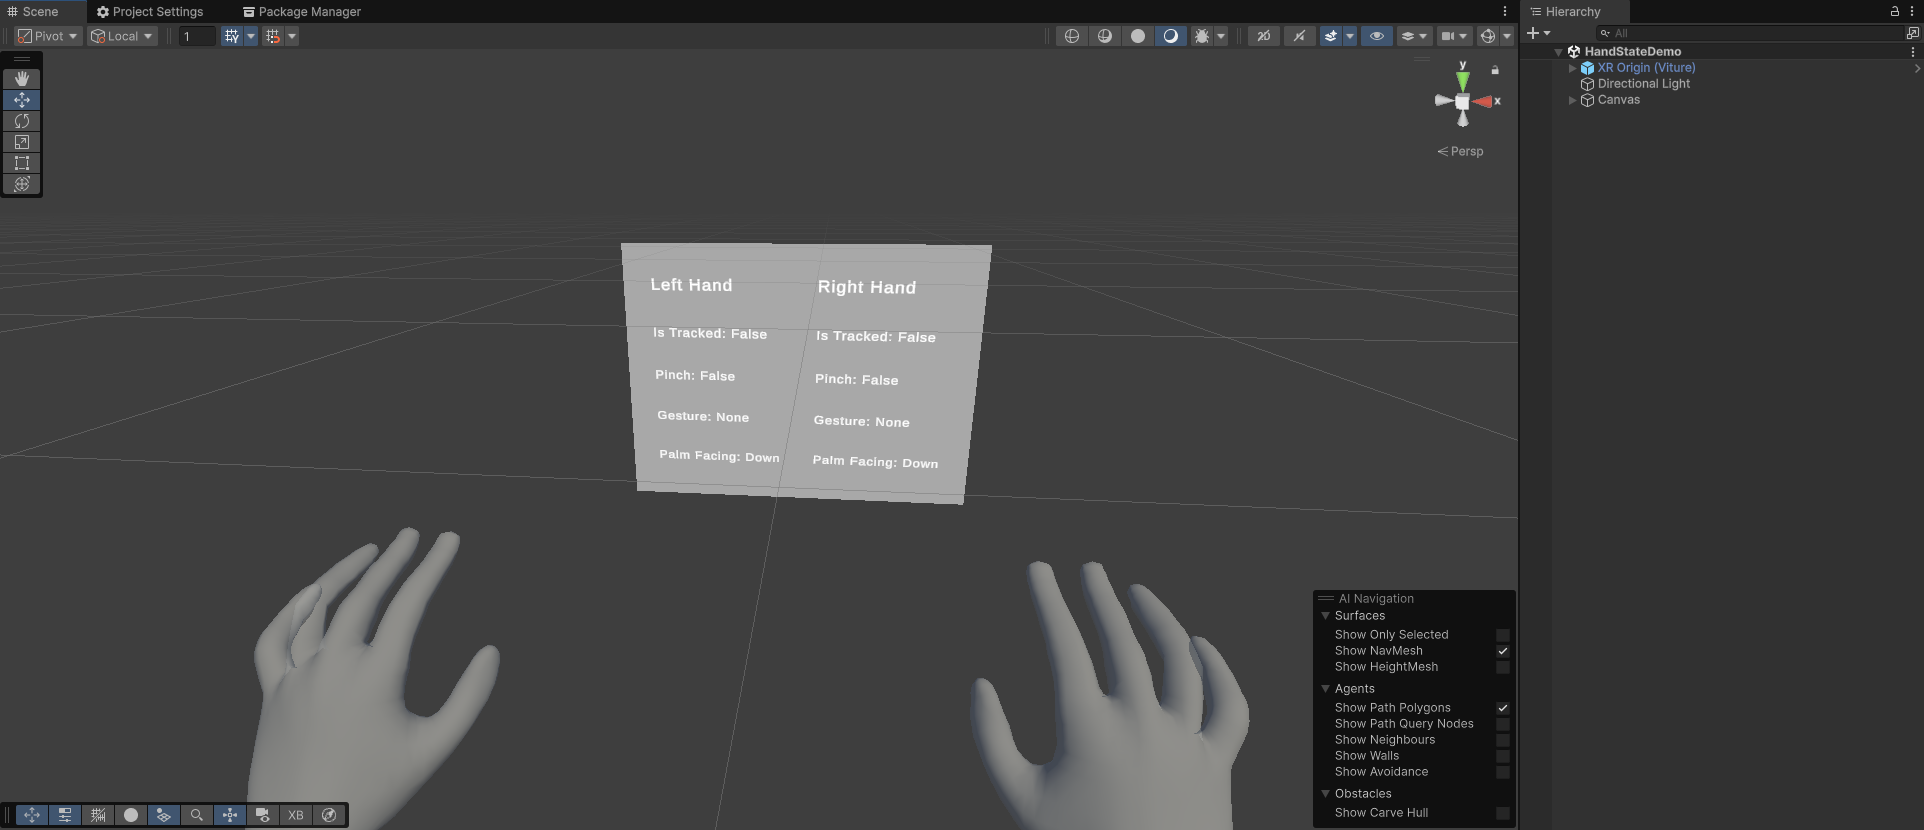
Beyond standard hand tracking, the VITURE SDK provides additional data including built-in gestures and palm facing states. This sample demonstrates how to access this extra data through Input Actions using both direct reading and callback methods.
The demo features a real-time UI displaying both hands' tracking states, gestures, and palm orientations. Reference the included script to see how to retrieve hand state data in your own code.
Roadmap
Recording (Oct, 2025)
Image Tracking (Dec, 2025)
Multiplayer Boilerplate Sample (Mar, 2026)
FAQ
A: Our SDK is currently built on Unity's XR architecture. OpenXR compatibility is planned for future development.
Support
For questions and technical support, please email zhangyuchen@viture.com.